Setting up 2 Redis instances on single Host with Adobe Connect 12 NCC Installation
*** Note : This article contains images. You may need to refresh the page to view them ***
Step 1 : Follow the instructions from the Install guide to install 2 Redis instances on your Red Hat server. Snippet below :
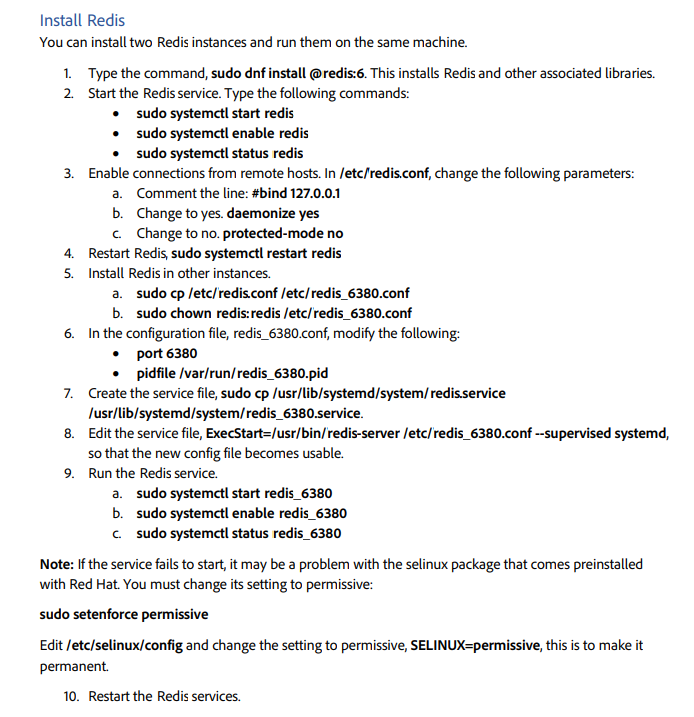
Also notice, at Step#8 in the above steps of Install guide, of editing the service file for the second Redis instance, redis_6380.service
In the ExecStart statement, there is a daemonize no parameter, which is present in the original Redis service file. Please note to keep this parameter intact while doing copy paste of the command from the install guide,
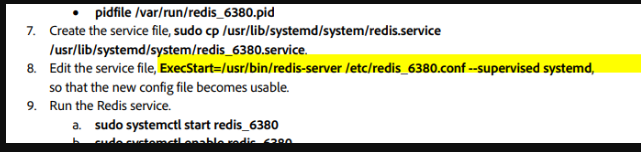
So keep daemonize no parameter intact as well while copy pasting the above line in the redis_6380 service file.
Step 2 : Navigate to the installer folder where installer files are copied to your Red Hat server :
cd ncc-onprem-installer
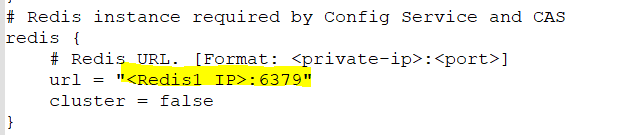
Step 3 : Modify Config/config.conf file in a text editor
Specify the IP address for the first Redis instance under the below config, with default port 6379 :
Step 4 : Next, modify the IP address and port for the second Redis instance in the same file, under the below config entry, with port 6380 :

Step 5 : Save changes and continue with the rest of the steps of the installation.