Adding a User Field to the Attendee Display Name
A common requirement for Adobe Connect customers is the ability to add additional fields to the user’s display name in the Attendee List Pod in Connect Meeting. A common scenario (for example) is the need to show a military rank before a user’s first and last name. Below is an outline of the steps to customize the display name for your Connect Meeting users if this is something that is required by your organization.
By default, the users First + Last names are shown in the Attendee List Pod. If you would like to add (for example) the field of ‘Rank‘ to the attendee’s display name, first you need to have an Administrator add this user field to the ‘Customize User Profile‘ area in Adobe Connect.
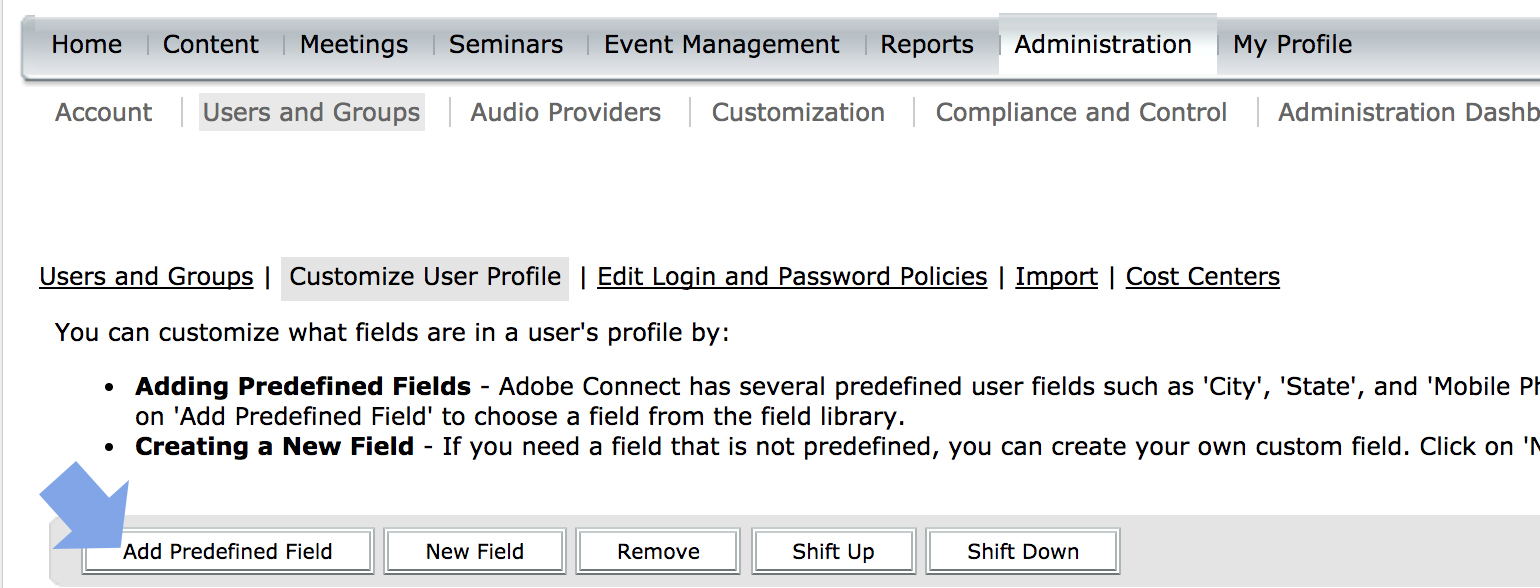
First, log into Connect as Administrator and navigate to ‘Administration > Users and Groups > Customize User Profile‘. Click on the ‘Add Predefined Field‘ button.
Note: Creating ‘New’ custom fields do NOT show up in the Meeting. You must use a Predefined field and it must be one of the following:
– Rank
– Department
– Organization
– Company
– Country
None of the other fields show up in the Meeting. I will show you how to workaround this limitation further below.
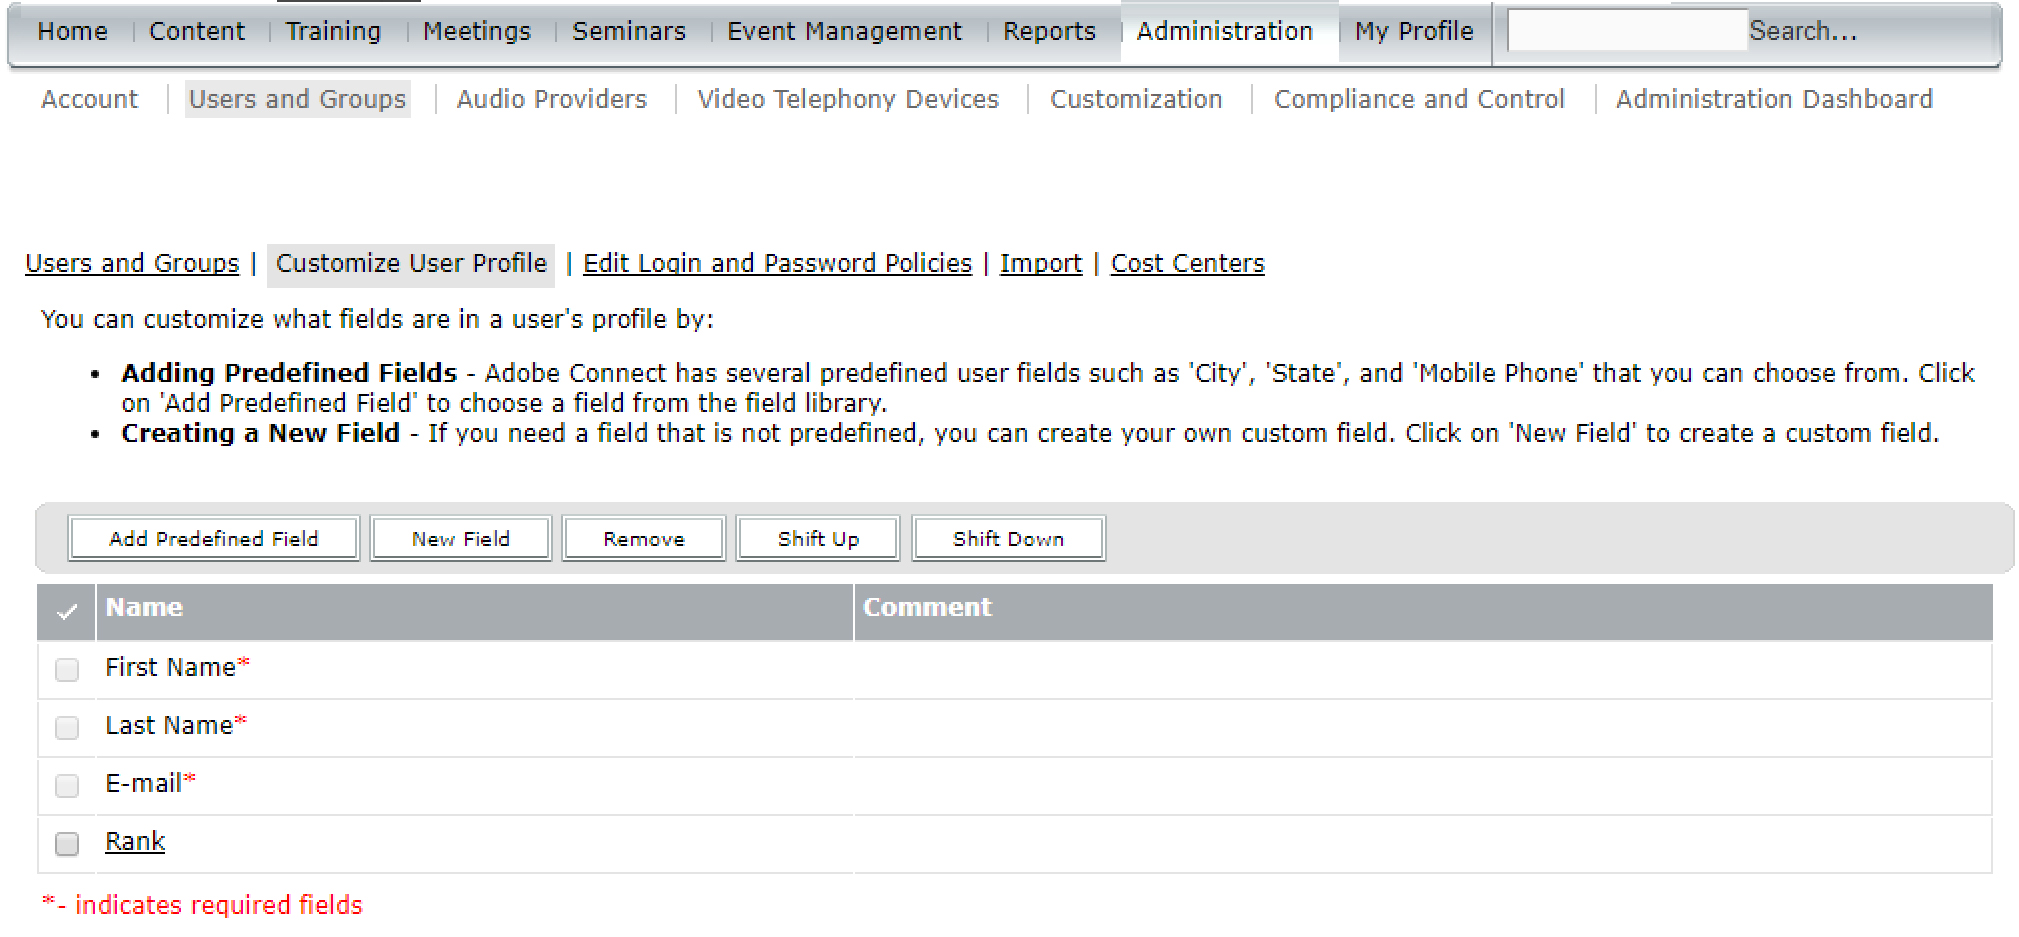
Next, select (in this example) ‘Rank‘ from the list of predefined fields.
 Click the ‘Save’ button.
Now, at this point you can populate this field manually with the user’s Rank value or via the API for existing and new users (as you would with any other field you are populating, like first-name, last-name, email, etc.).
If you would like to add this field into your LDAP directory service integration (this only applies to On-Premise Adobe Connect systems with LDAP integration) so it maps and synchronizes to an existing LDAP user field (in this case for ‘Rank’), you would do the below:
First, as a system Administrator with back-end access to the Adobe Connect server(s), navigate to http://localhost:8510/console on one of the Connect servers in your cluster and go to: ‘Directory Service Settings > LDAP Settings > User Profile Mapping’.
You will see (as in the screenshot below) all of your User Fields for Connect and the corresponding LDAP Directory Service Fields they map to. You should now see (in this example) the new field (‘Rank’).

After mapping it appropriately to your LDAP Directory Service Field Name that corresponds to your Rank field (in my example I have a field in LDAP called ‘rank‘ where my data is stored), click Save.
When you synchronize from here on, you will have that Rank field populated with the user’s rank information if it exists in the directory.
Now, in Connect Meeting, whether you are manually populating the Rank field or using LDAP, you can (as a host) click on ‘Meeting > Preferences…’

Then, select ‘Display Name‘.

Now on the Display Name Preferences screen, you should see your available fields (on the right). In my example, I now have all available fields (only those 5 can be added at the current time of Adobe Connect 9.7).
You can select ‘Rank‘ and then hit the Left (bottom) Arrow to move the field over into the ‘Displayed fields’.
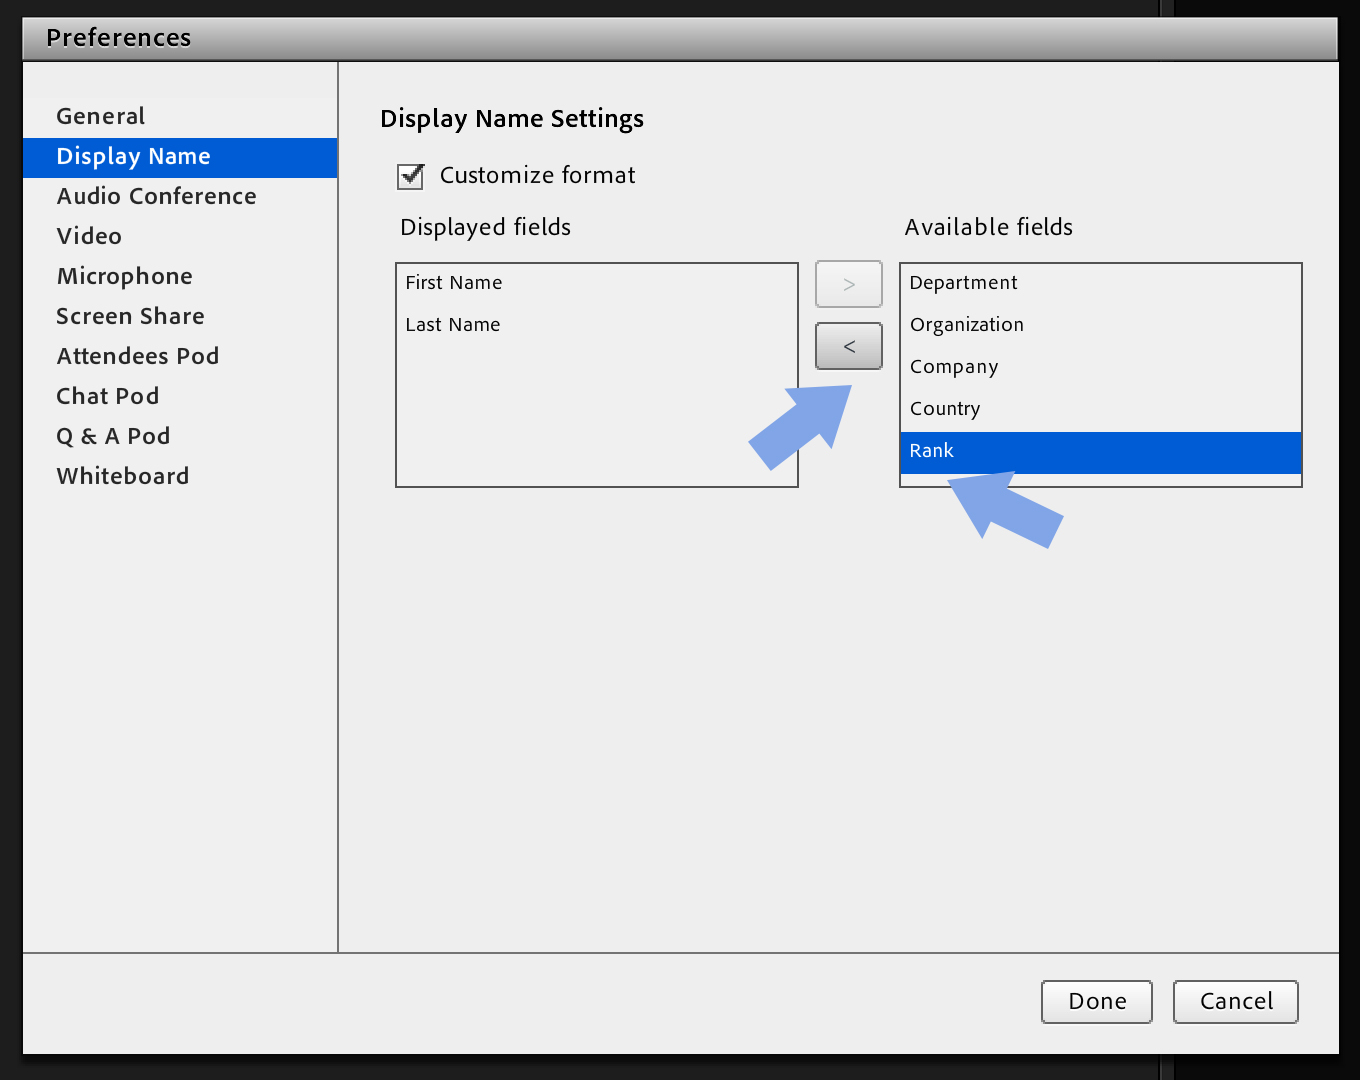
You can now select ‘Rank‘ from the left side and drag up to be above ‘First Name’ so that it appears first in the display. You can also select a separator if you need one between Rank and First Name.


Click the ‘Done‘ button.
Now, in the Attendee List Pod in Connect you should see the value for “Rank” + First and Last name (as seen below).

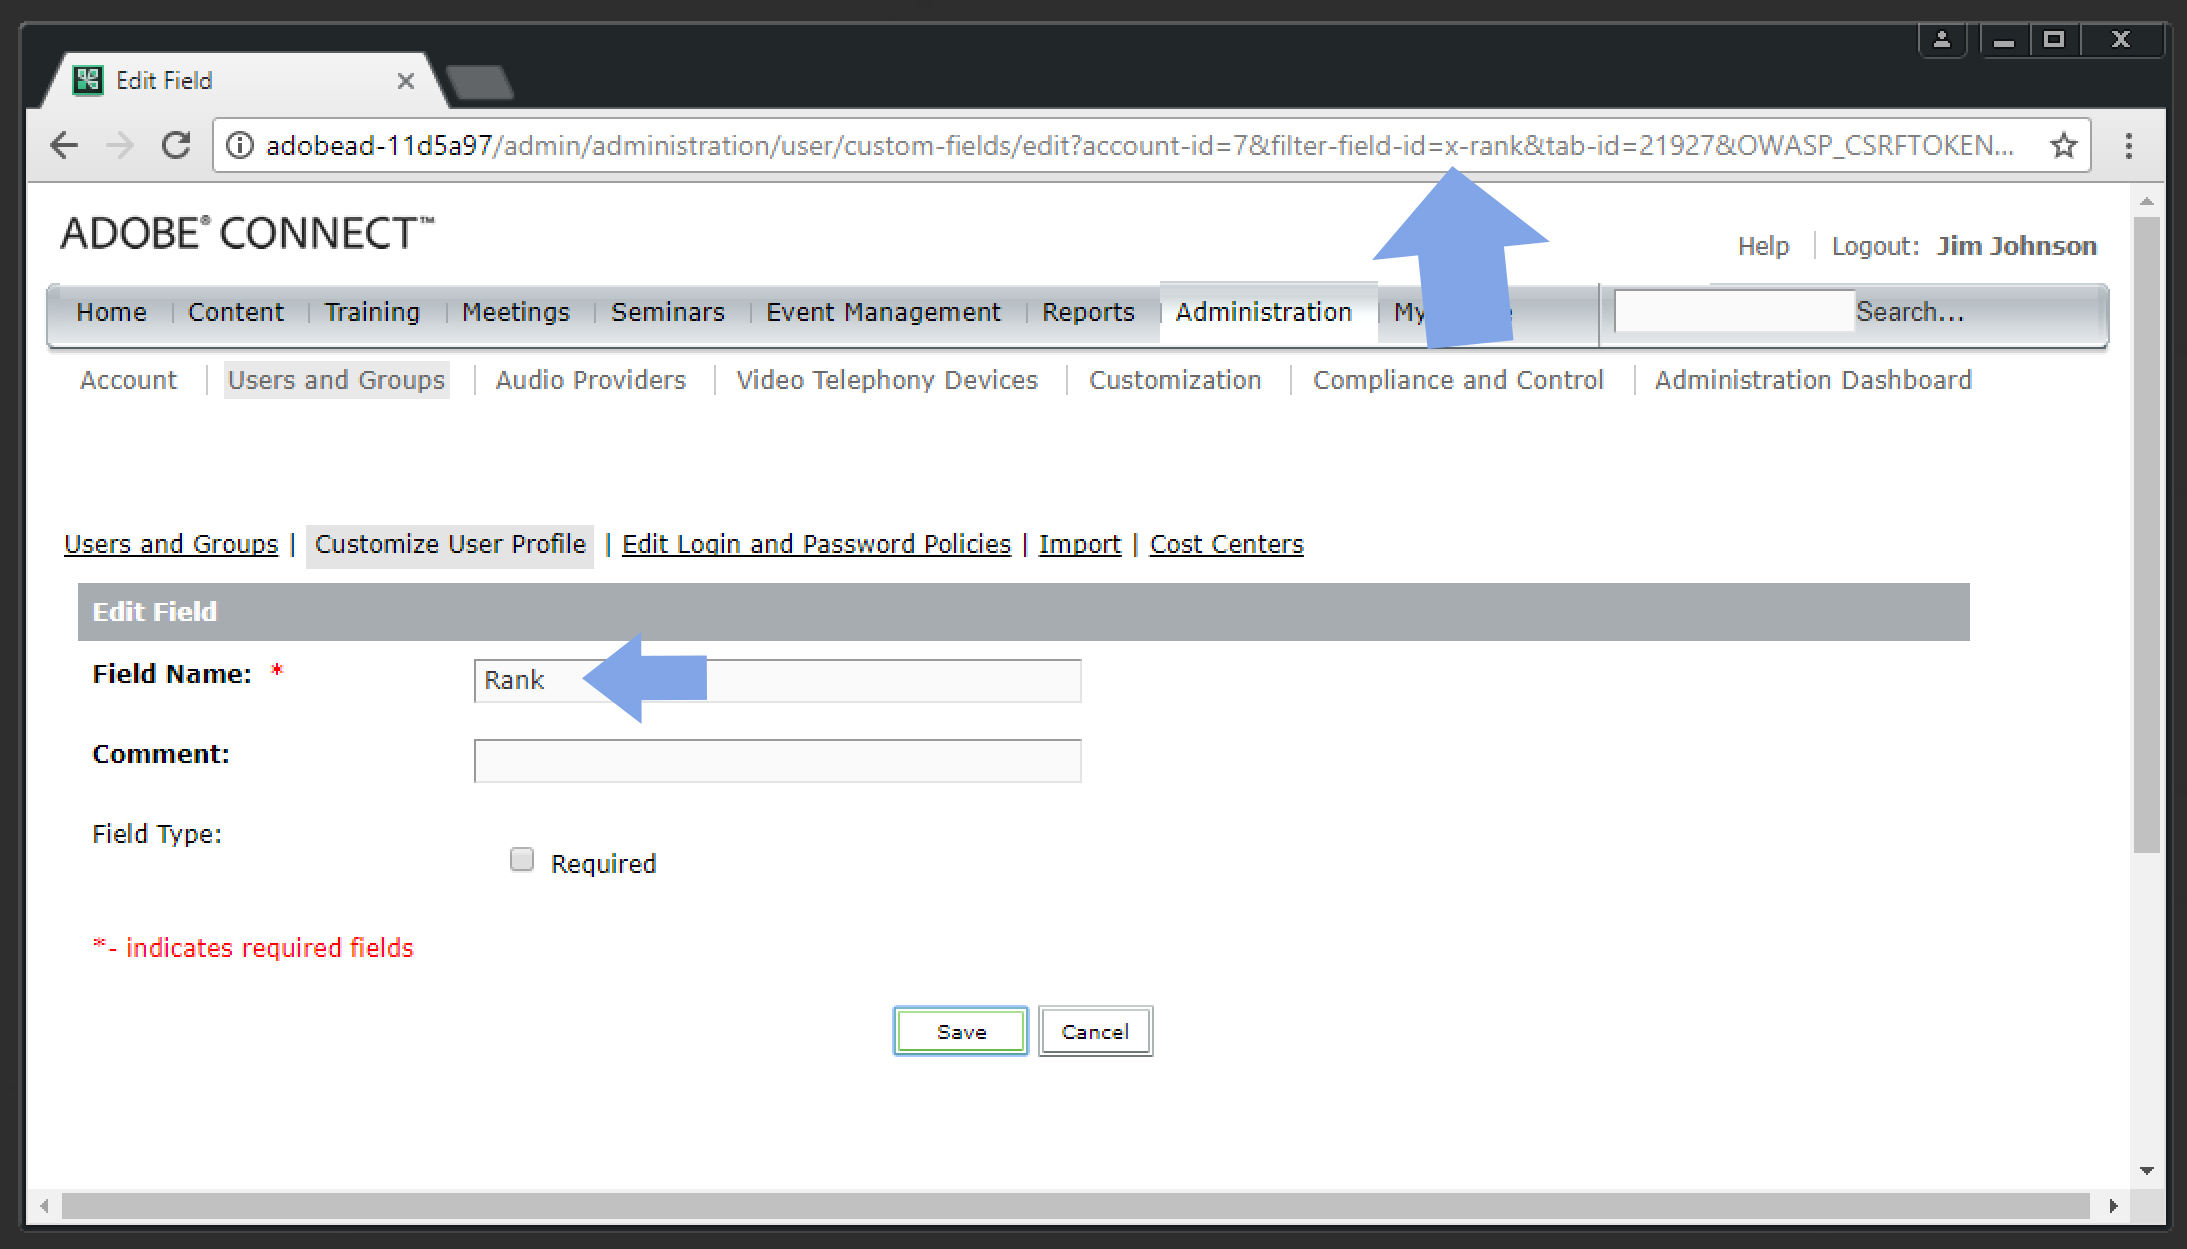
One other thing to note is that although you can only use the predefined fields Rank, Department, Organization, Company, and Country, you can also edit the names of those fields if you want. Say you want to use a field called ‘Employee ID‘. Well, since that is not one of the predefined fields that can show up in the Attendee List Pod, you can go into a field you don’t use (like ‘Rank’ for example), and change the name to suit your needs.
If you go back into ‘Customize User Profile‘ and click on the hyperlinked ‘Rank‘ field after you add it, you can then change the name.
 Note: that when you change the Field Name of that predefined field (‘Rank’ for example), the actual field-id (if you use the API) will still be ‘x-rank‘. You can see in the URL below when you are on the page to edit the field name, it references the field-id=x-rank. This value never changes. In the API and in the DB, it will be still ‘x-rank’ but for the display purposes in the web app and in the Meeting Attendee Pod, it will show as the edited name. If you do XML API integration of any sort and need to reference the field-id, it would be still ‘x-rank’ no matter what you called it for a Name.
Additional Tip: If you want this to persist in all meetings, you will need to make the above Display Name change to any Meeting Templates (default or custom) you use on your system to create meetings off of. It will not set this for existing meetings, but all future meetings you create off of a template you made this change in, will have this display preference saved. You will have to make this change to all existing meetings if you want the display name to include Rank.