Configure SSO in Adobe Connect with Microsoft ADFS
Objective: Configure SSO in Adobe Connect with Microsoft ADFS.
Environment:
- Adobe Connect Hosted
- On-premise version 10.2
Solution:
- Contact Adobe Connect support team to enable SSO on your account.
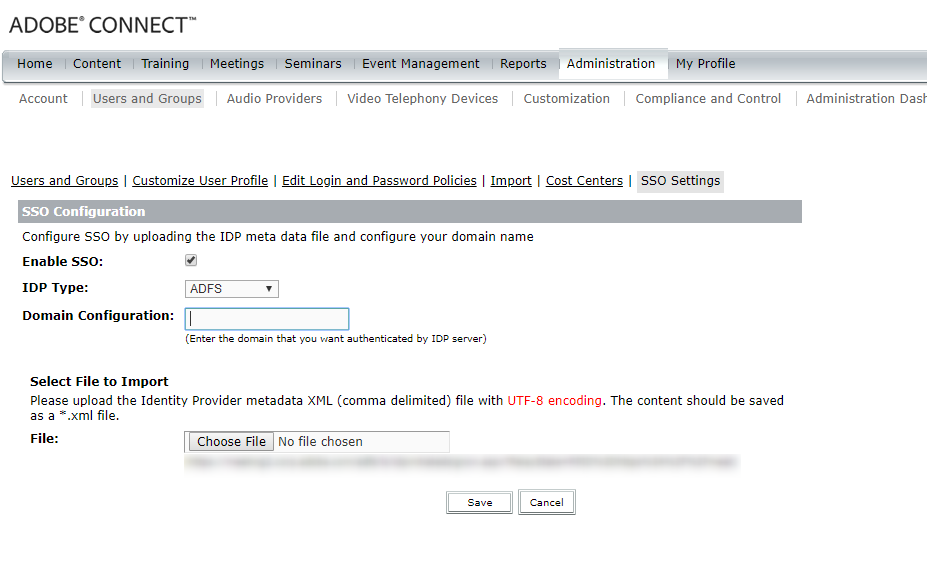
- Once the SSO feature is enabled, Login into Adobe Connect central > Click on Administration tab > Users and Groups > SSO Settings.
- Under SSO configuration check “Enable SSO”, select IDP type as ADFS.
- Under Domain configuration enter the domain that you want to be authenticated by IDP. Eg : @domain.com
- Under select file to import, click on choose file and select the IDP metadata and click on save.
Configure the AD FS Server :
- Find the SP metadata from this link. Since it’s a sample metadata, make sure to edit the sample metadata and replace the entity-id and location with your actual account URL.
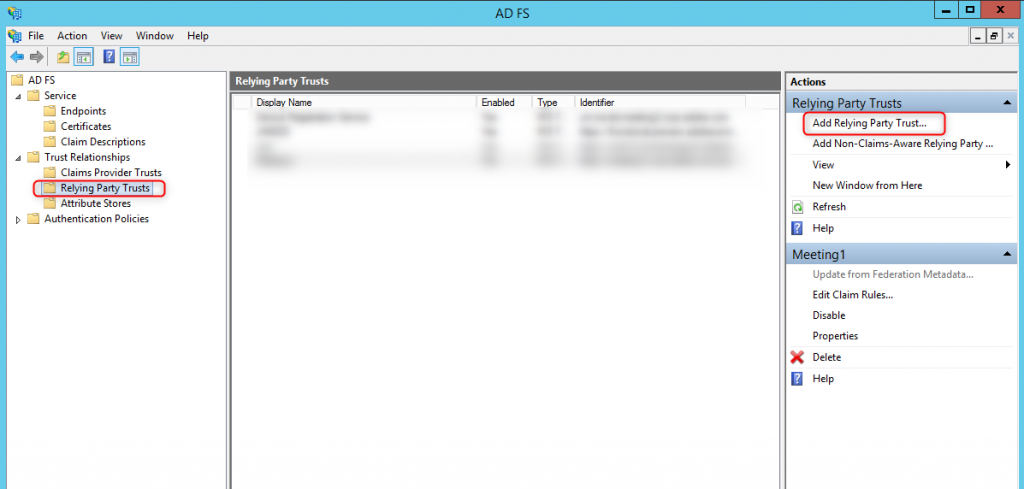
- Navigate within the AD FS Management application to AD FS > Trust Relationships > Relying Party Trusts and click Add Relying Party Trust to start the wizard.
- Click Start and under “Add Relying Party Trust Wizard” select the second radio button and browse to the location of the Service provider metadata and click next
- Under Display name, choose any name you like and click on next.
- For Multi-factor authentication choose the desired option and click next
- Under Issuance Authorization Rules, choose the desired option and click next.
- Review your settings and click on next and in the next screen check “edit claim rules” and click close.
- If the Edit Claim Rules wizard has not opened automatically, you can access it from the AD FS Management application under AD FS -> Trust Relationships -> Relying Party Trusts, by selecting your Adobe SSO relying party trust and clicking Edit Claim Rules.
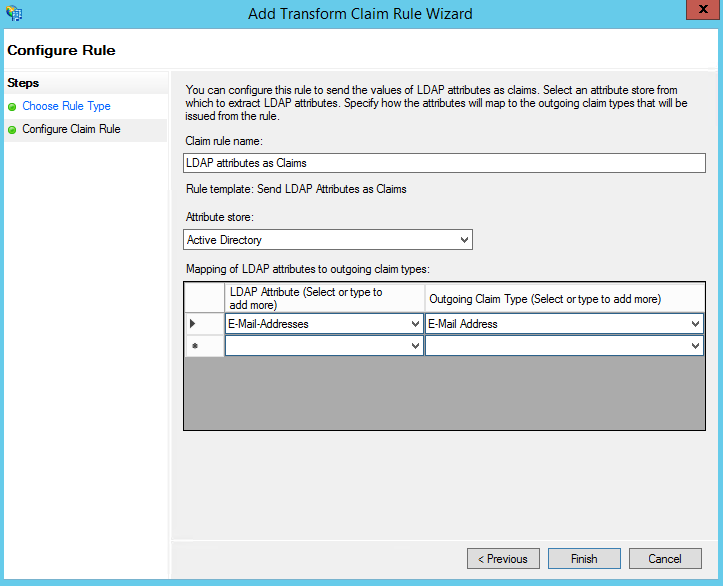
- Under Claim rules click on Add Rule and configure a rule using the template Send LDAP attributes as Claims for your attribute store, mapping the LDAP Attribute E-Mail-Addresses to Outgoing Claim Type E-Mail Address and click Finish.

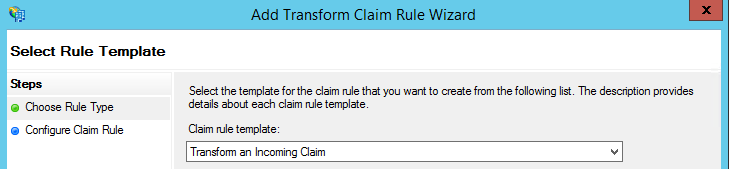
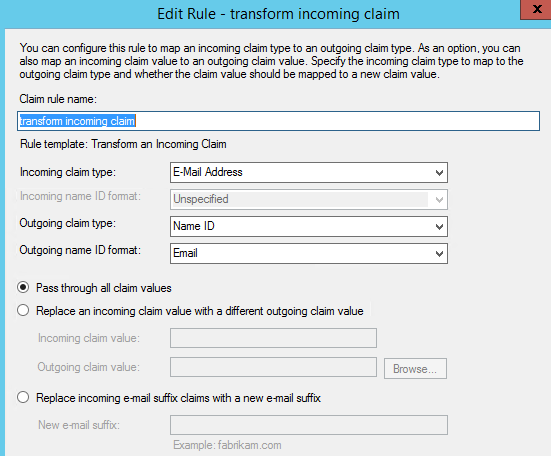
- Again, using the Edit Claim Rules wizard, add a rule using the template Transform an incoming claim to convert Incoming claims type E-Mail Address with Outgoing Claim Type as Name ID and Outgoing Name ID Format as Email. Select Pass through all claim values radio button and click finish.
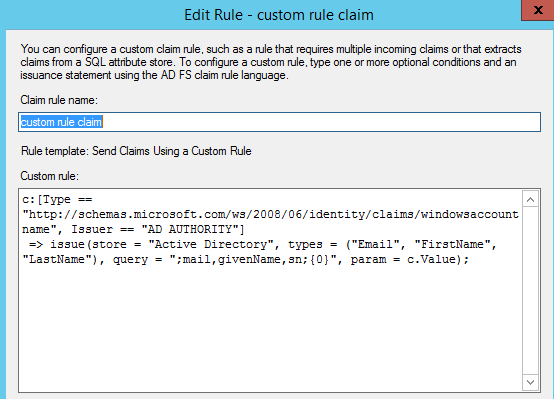
- Using the Edit Claim Rules wizard, add a rule using the template Send Claims Using a Custom Rule containing the following rule:
c:[Type == “http://schemas.microsoft.com/ws/2008/06/identity/claims/windowsaccountname”, Issuer == “AD AUTHORITY”] => issue(store = “Active Directory”, types = (“Email”, “FirstName”, “LastName”), query = “;mail,givenName,sn;{0}”, param = c.Value);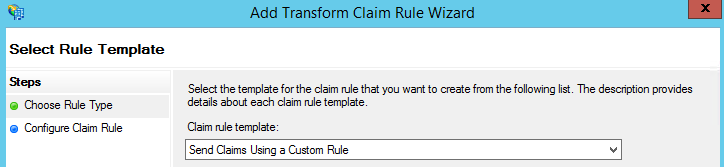
- Click ok to save the rule and test the SSO functionality.
