How to make your custom meeting template as default template
Problem Statement: How to make your custom meeting template, selected as default template on creating new meeting rooms.
Environment:
- This article is applicable only to Adobe Connect On-Premise (licensed) installations.
- This is not applicable to Adobe Connect Hosted customers.
Solution:
First, take a backup of sco_edit.xsl from <CONNECT_HOME>/appserv/apps/meeting/sco_edit.xsl on Adobe Connect server.
Next, follow the steps:-
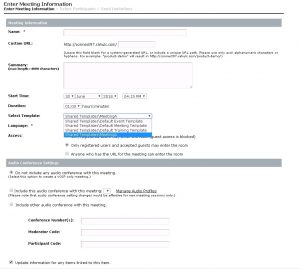
- Create a new meeting using default meeting template and launch the room.
- End the meeting room (do not simply exit)
- Move the room to Shared Meetings > Shared Templates folder.
- append ?mode=xml to the meeting room URL (e.g. http://name.com/meetinga/?mode=xml)
- Get the source-sco-id=’xxxxx’
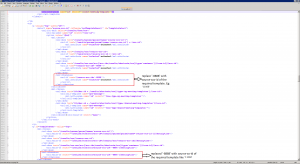
- update sco_edit.xsl by, replacing the default source-sco-id=’-8888′ with
the source-sco-id=’xxxxx’ of the required custom template.
Note: source-sco-id needs to be replaced at 2 locations as seen below in the snapshot
- Save the changes and Restart the Connect Services.
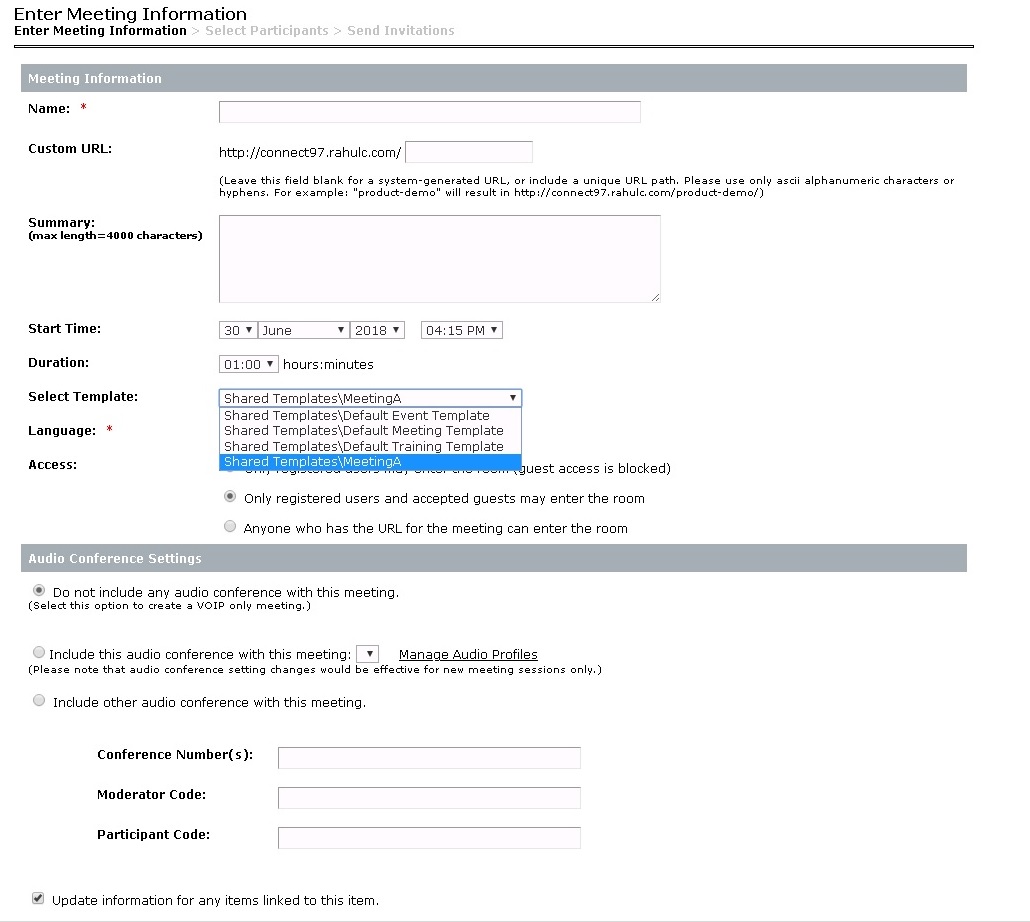
- If you now try creating a new meeting room, you will select the custom template selected as default.

Additional Information:
- If you have an existing meeting room in the shared templates folder, you may use it as a default template for newly created room.
- Also, get the source-sco-id, using database query-
Select SOURCE_SCO_ID from pps_scos where sco_id= ‘1111’
Note: ‘1111’ represents the actual Sco-ID of the meeting.