Empty session in the redirect after a user logs into to an Event
If you have recently upgraded to Adobe Connect 9.1 with the Events Module, you may run into a problem where after your users log into an Event via the Event Login page, they are redirected to the Adobe Connect login page with an empty session variable in the URL. So instead of immediately letting the user into the Event (be it a Meeting, Training Course, etc) it simply redirects the user back to the Adobe Connect login page with the URL: https://{connectURL}/{eventURL}?session= .
This is a known issue where the CQ packages for 9.1 were not applied with the installer if this was an upgrade from a previous version of Adobe Connect.
To resolve this issue, steps must be taken to update the CQ packages on the Author and Publish instance of every CQ server in the cluster/environment.
Here are the steps. Please read this carefully.
Updating the CQ Instance for Author and Publisher after upgrading to Adobe Connect 9.1
These steps below are first done on the CQ Author instance on the CQ server, which has a 4502 port value after the FQDN. The EXACT same steps are applicable for the Publisher instance at port 4503. What you have to do is follow these steps through to the end on the Author instance (port 4502) and then REPEAT all the way through for the Publisher instance (port 4503).
First, download the following files to all the CQ servers you need to update:
These steps below are documented for performing first on the CQ Author environment and for the basis of this document, I will reference the Author instance when referring to the URLs to navigate to. HOWEVER, after you are done with these steps on the Author instance of CQ (port 4502), the EXACT SAME steps need to be cycled through again, in their entirety on the Publish instance of CQ (port 4503). For the sake of making this document as brief as possible, I did NOT repeat all the screenshots and steps for Publisher, as they are exactly the same, except a different port (if the CQ Author and Publish instances are on the same machine). If they are on separate machines, you’d obviously need to perform this on that other machine. You also need to do this on EVERY CQ server in the cluster (if you have a cluster of CQ).
On the CQ Author Server, navigate to:
http://{CQURL}:4502/crx/packmgr/index.jsp (where {CQURL} value is your FQDN for CQ)…

Log in with your admin user/password. (If you don’t login with user/pass you will see ‘No packages found’ when looking at the Package Manager).
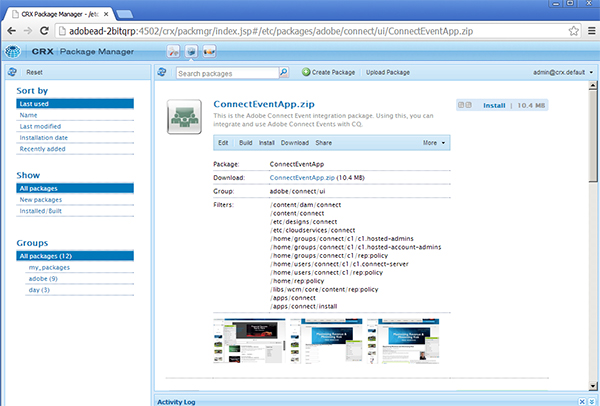
Once into the CRX Package Manager (shown below):
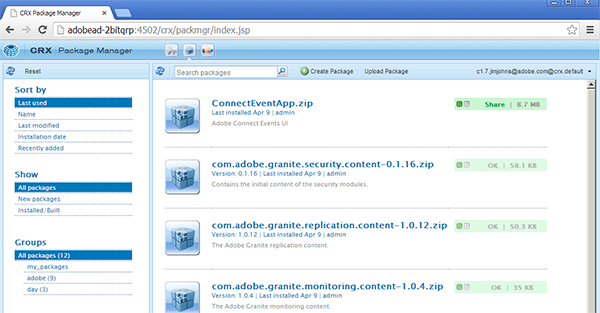
Make sure you are logged in as an ‘admin’ (in top right-hand corner):
Look at the ConnectEventApp.zip (the first package listed in the list). If the ConnectEventApp.zip’s icon is a blue cube (as shown above) and the size is 8.7MB, it was NOT updated by the Adobe Connect 9.1.1 installer and needs to be deleted and updated with the new package.
The old package that should be updated would look like this:

The new package would look like this (it will have the Adobe Connect Logo and will be a larger 10.4 MB in size):

You need to Delete the old ConnectEventApp.zip package and upload the new one (downloaded from the link at the top of this document).
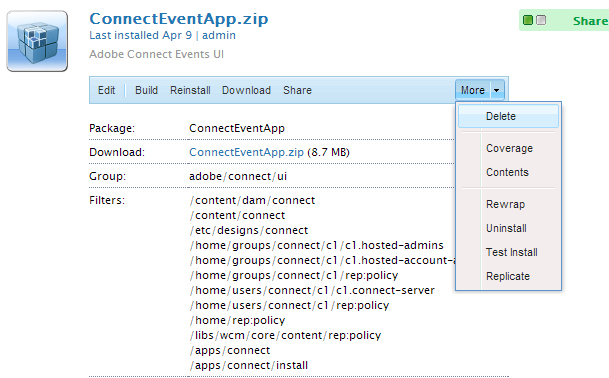
First, click on the ‘ConnectEventApp.zip’ package name in the list to expand the information and options below it.
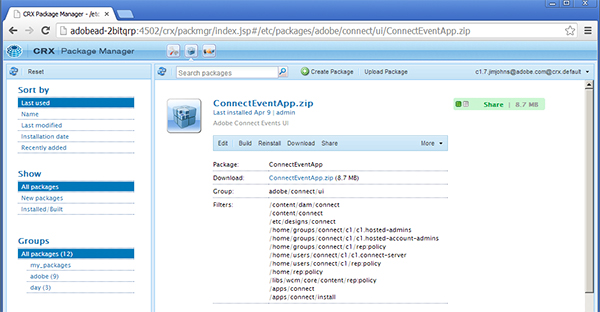
Then click the ‘More’ dropdown in the top right-hand corner of the options menu and select ‘Delete’ from the dropdown options (shown below):
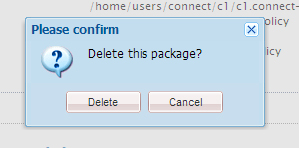
Confirm the deletion by pressing ‘Delete’ button:
You will now see the package is deleted and it gets removed from the list. You also see the deletion being logged at the bottom in the Activity Log area. If you see a red error in there, it is probably because you are not logged in as an admin, therefor it won’t be deleted.

Now, click on the ‘Upload Package’ link at the top of the page (shown below as well):

In the ‘Upload Package’ pop up window, navigate to your ConnectEventApp.jar that you downloaded above, and select it. Do NOT click ‘Force Upload’ option.

Once the package has finished uploading, you will now see the following (below) in your packages:
Now you need to INSTALL the package.
In the top right-hand corner you see the ‘Install’ link in blue (shown below as well):

Click Install.
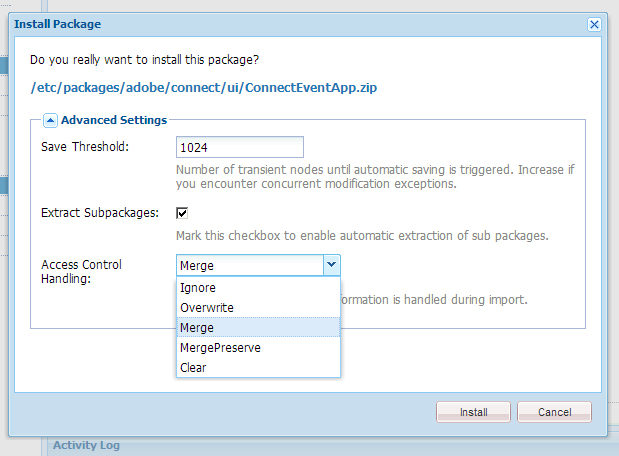
In the ‘Install Package’ dialogue that comes up, be sure to select ‘MERGE’ as the Access Control Handling option. By default this is ‘Overwrite’. Select ‘Merge’ and then click the ‘Install’ button.
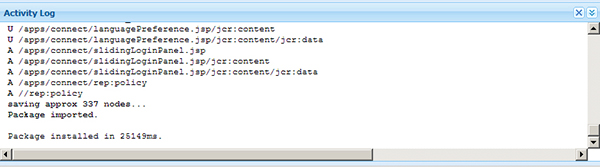
You will see a lot of logging in the ‘Activity Log’ area below the package until it finishes with a ‘Package installed’ message (shown below).
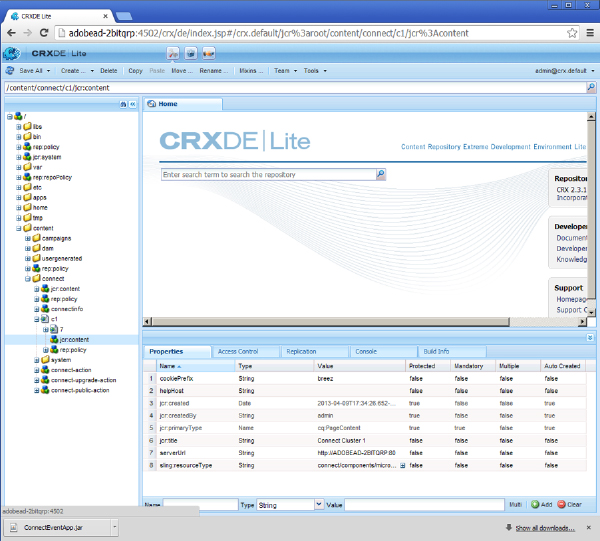
Now navigate to CRXDE Lite on the CQ Author server:
http://{CQURL}:4502/crx/de/index.jsp (where {CQURL} value is your FQDN for CQ)…
Drop down through the following path shown below: (content>connect>c1>jcr:content)

Look in the Properties tab and confirm that:
The ‘cookiePrefix’ value is equal to the DB_PREFIX= value in your custom.ini located on your Adobe Connect server at: C:\Connect\9.1.1\custom.ini.
![]()
Look at the ‘serverUrl’ value and make sure it matches your Adobe Connect Host value (FQDN) of your Adobe Connect system.
![]()
This is the full view:
Now navigate to the system console on the CQ Author server:
http://{CQURL}:4502/system/console (where {CQURL} value is your FQDN for CQ)…
Log in again as an admin if it prompts you.

On this page, search for ‘connect’ (or scroll down until you see the item below).
You will be taken to the item (bundle): ‘connect-osgi-service’
![]()
Click on the item to expand:
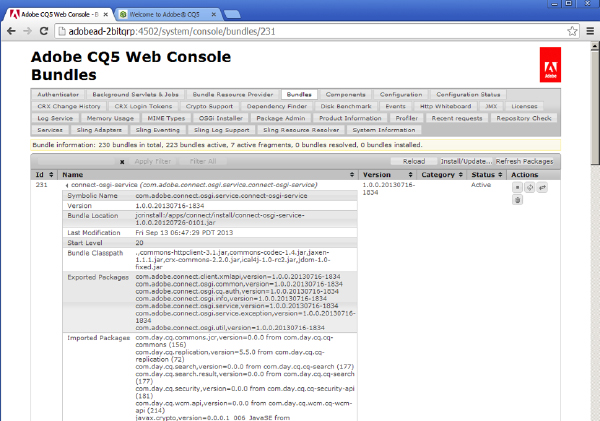
Confirm the version of the bundle.

The latest version for 9.1 should be: 1.0.0.20130716-1834
If your version is different (older) than this version (as in this example where my version is: 1.0.0.20120726-0101), you need to update the bundle.
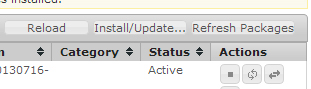
Click ‘Install/Update’ button in the header above the item information (shown below):
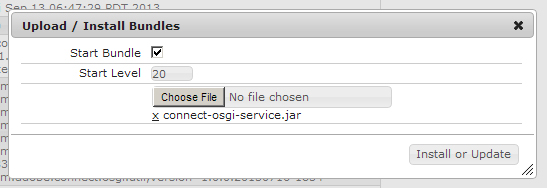
On the ‘Upload/Install Bundles’ pop up window, click on:
‘Start Bundle’ and make sure it is checked.
Click ‘Choose File’ button and navigate to your ‘connect-osgi-service.jar’ that you downloaded from the top of this document.
Click ‘Install or Update’ button.
Once this is done, search again for ‘connect’ in this page and find the ‘connect-osgi-service’ item again.
Click on the third button on the right (the one that looks like two arrows moving in different directions and it will say ‘Update’ if you hover over it with your pointer) (shown below):
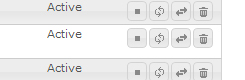
It should update quickly, and show ‘Active’.
Now, REPEAT all the steps above for the PUBLISHER instance of CQ. All the URLs and steps will be the same except the URLs will use 4503 rather than 4502.
Once you do this through and repeat for the Publisher instance at 4503, Stop and Restart the Services.
- First stop Adobe Connect CQ-Author, then stop Adobe Connect CQ-Publish.
- Then start Adobe Connect CQ-Author, then start Adobe Connect CQ-Publish.
![]()
Remember to clear your browser cache!!!
Now test your Events to see if they are working correctly.
Addendum:
If you do not have the ‘cq-5.5.0-hotfix-NPR-2061-1.0.zip’ package visible in your Package Manager on both 4502 and 4503 (the same place you uploaded and installed the ‘ConnectEventApp.zip’ file), please follow the same steps to Upload this package (which can also be downloaded from the links above) and Install on both 4502 and 4503). Remember to upload, and then install choosing the ‘Merge’ option. Once this uploads, it should show up in the list as below:

If you already see that hotfix, you do not need to do this step. If you do have to add this hotfix, please do so and then stop/restart the CQ services again. This also needs to be done on EVERY CQ Author and Publisher instance in the cluster.