Avoiding and Solving Common On-Premise Connect Server Installation Errors
As the title suggests, this article pertains to Adobe Connect on-premise server installations; it does not apply to Adobe Connect Hosted, Adobe Connect Managed Services (ACMS) or Managed ISP Connect customers. It has a server-side administrative focus. If Adobe or a third-party is administering your servers, you may ignore this article unless you need help sleeping in which case you may pop it open in bed after a glass of port; it has helped me overcome insomnia.
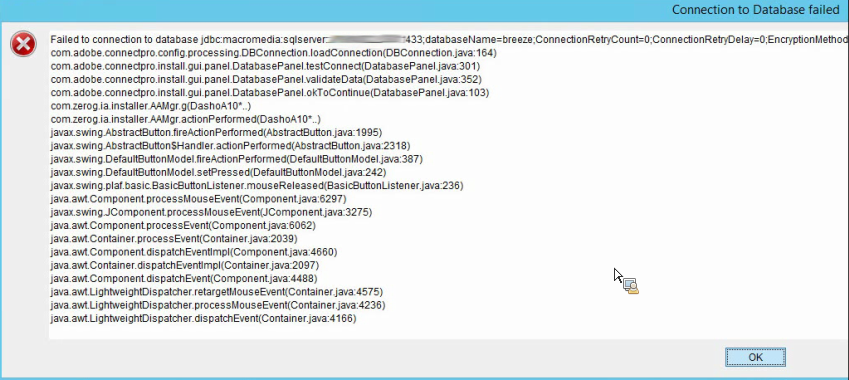
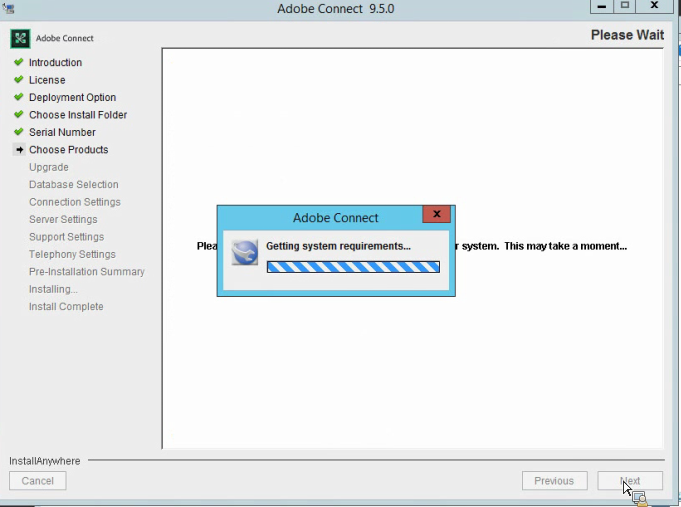
There are many variables commensurate with on-premise Adobe Connect installations. The purpose of this article is to point out some of the more common errors that may be encountered by a Connect administrator during the course of a basic Connect on-premise installation and to suggest ways of avoiding them, or if encountered, ways of solving them. See one of the common installation errors can happen when connecting to SQL and creating or updating the database depicted in this screen capture:
Another common installation error reads: The installation of Adobe Connect finished, but some errors occurred during the Install. Please see the installation log for details.

This article will discuss these errors along with other common potential installation challenges and how to deal with them.
Note: This article is intended to provide supplemental installation guidance; its best use is in correlation with primary Adobe Connect installation documents; this article is not intended to be an exhaustive installation guide, its scope is limited to helping facilitate a successful error-free basic installation of Connect; see the following links for additional and more in-depth installation and guidance with Connect architecture:
- Adobe Connect Technical Requirements
- Migrating, Installing, and Configuring ADOBE CONNECT
- Adobe Connect SSL guide
- Adobe Connect server pools/clusters and hardware-based load-balancing devices with SSL acceleration
- Connect Meeting RTMP VS/VIPs on Load-Balancers
- FAQs on Adobe Connect SQL Database Installation, Startup, Connection and Pooling
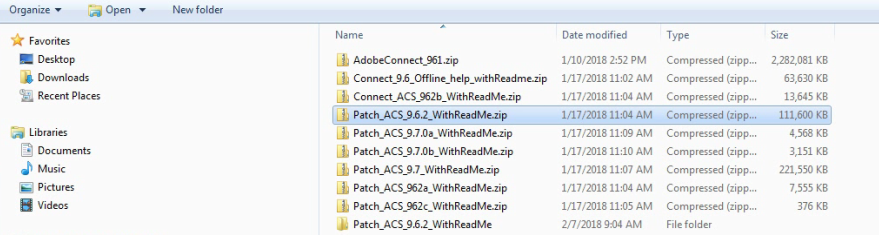
At the updating of this article, Connect version 9.7b has just recently been released. Currently in order to make sure you are prepared to conduct a complete fresh server installation, you need the full Connect 9.6.1 installer and all of the updater files up to and including 9.7.a. It is prudent to download any needed installers and updaters well in advance of your planned installation window as many are quite large and will take some time to pull down:
- The full 9.6.1 Connect server installer is available on the Adobe Licensing Website
- The 9.x updater installers are available here: Find on-premise patch files for Adobe Connect 9
- Prior installers are available here: Adobe Connect Downloads and Updates
- The installers include readme files so it is helpful to have Acrobat Reader installed on the Connect server
- It is helpful to have telnet installed on the Connect server to allow testing connections to various remote ports particularly when installing a cluster
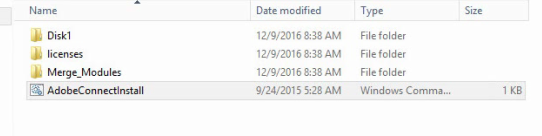
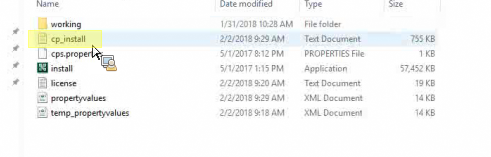
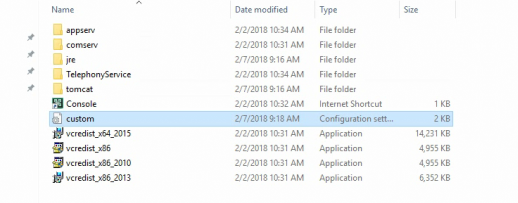
Your local installation directory should look like this:
Along with the installer and updater files, make sure you have your license.txt file downloaded and available locally on the Connect server to which it will be applied. It is imprudent to expect to be able to download a Connect license.txt file directly to a Connect server during the installation; many security server-side restrictions prescribing limitation and constraints will certainly be in place to make that option difficult if not impossible. It is best to download the license file to a remote client and place it on the Connect server along with the installers and updater files for easy access during the relevant portion of the server installation process.
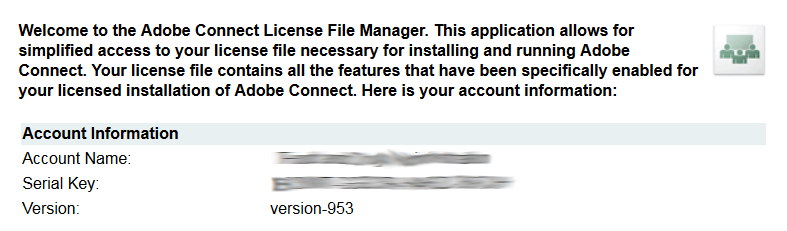
The license files are available on the Adobe Connect License File Manager. To gain access, append your Connect server serial key at the end of this URL:
https://license.adobeconnect.com/hosted/license?serial-key=
Make sure that your license is for the version that you are installing. The version will be listed at the top of the Adobe Connect License File Manager web page:
For upgrades that span many Connect versions, you may need a library of license files. Contact the Enterprise Connect Support Team for assistance if needed as you may need to download multiple versions of license files as the support team incrementally updates them for you in order for you to create a license version library to support an upgrade from a legacy version of Connect all the way to the most recent shipping version. Connect licenses can be upgraded, but not downgraded so be sure to keep earlier versions of the license on file as needed.
Be sure to install Connect using local admin permissions on the server. Begin by extracting the full installer that you previously placed in the installation directory:
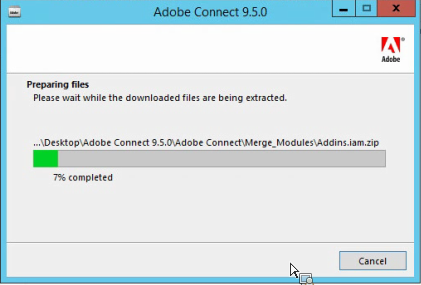
This will result in the creation of an installation sub-directory for the full installer from which you will install Connect on the server.
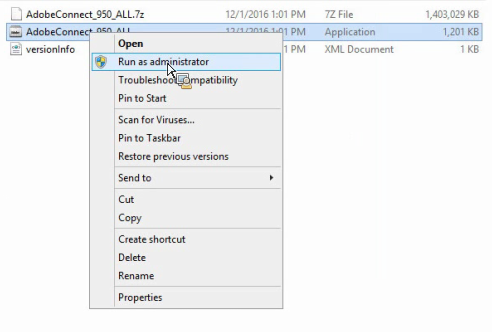
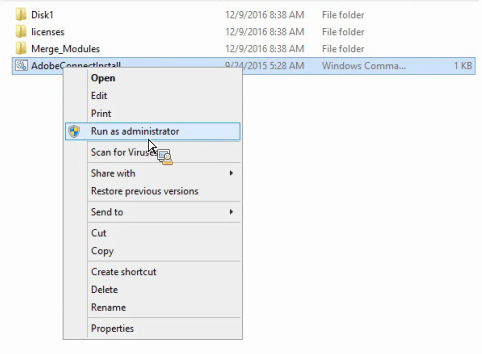
Drill into the Adobe Connect sub-directory and attempt to run the full installer as an administrator: Right-click and choose the Run as administrator:
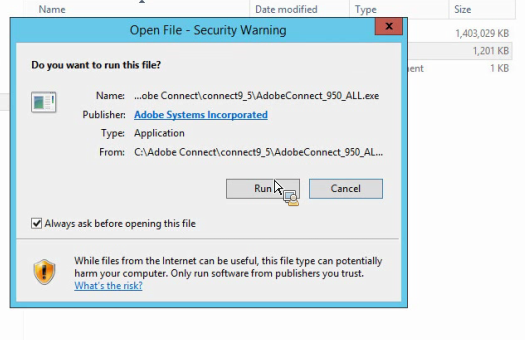
You may see this pop up next:

If after clicking yes, the installer does not launch, but rather returns you to the installation directory, then it failed to run and you need to take a different approach using a different installation option described anon.
Note: If the installer fails to launch when you right-click and choose the Run as administrator option pictured above, do not double-click on the installer: Double-clicking will risk a corrupted installation.
To use an alternate installation option: Drill into Disk1>InstData>VM and run the installer found there; right-click and choose the Run as administrator option pictured below, as before, do not double click on this installer:

Note: In the rare case that the installer again fails to launch, then see the elevated command-line installation options in this article, otherwise drive on with the installation: Connect Elevated Command-line Installation Options (to be published shortly)
Note also: If you see a disc space warning and are sure you have enough disc space to continue, it is most likely caused by a prior Connect installation or upgrade running in the background.

The installer checks if any Connect services are installed on the the system and present in a stopped or disabled state; delete any of the Connect services present the installer. This is only a local space check and does not check the database or shared storage, etc. The installer checks for previous installations and finds any existing Connect service and switches to the upgrade workflow since the Connect install directory was deleted from the previous installation.
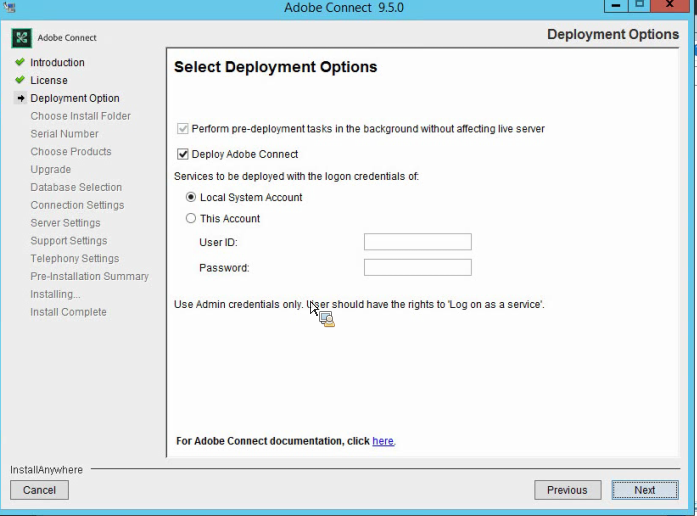
I am choosing the local system account for the installation; the installer needs administrative privileges:
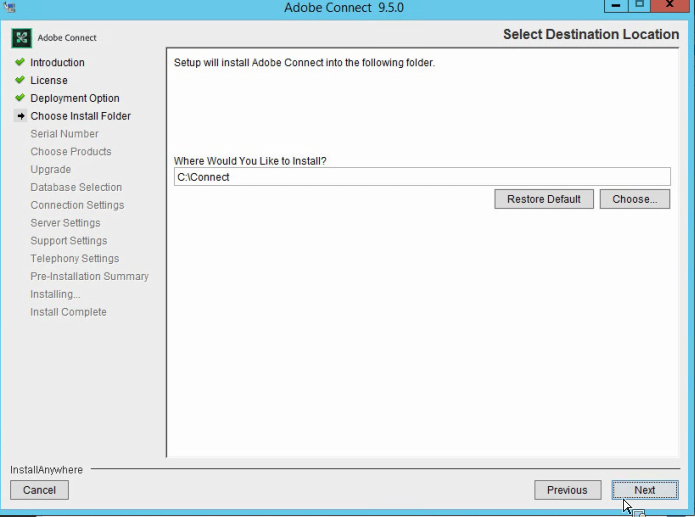
Choose the correct installation directory:
Enter your server serial key provided by Adobe:
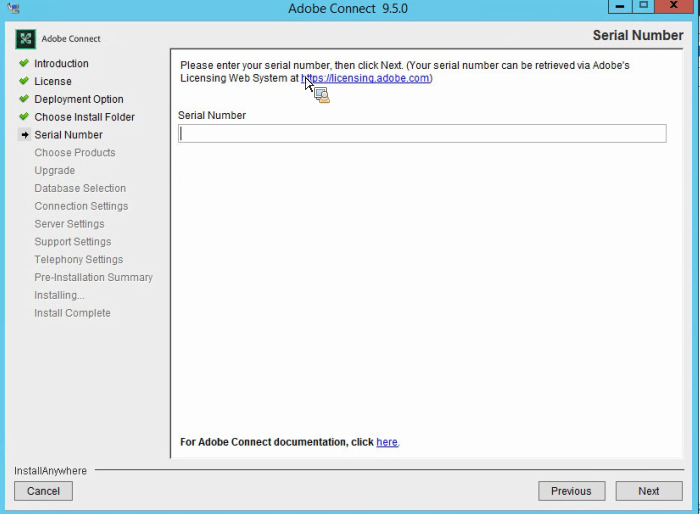
At this point you will be glad that you already downloaded your license.txt file as previously suggested. The options to download it from the Adobe Connect License File Manager or to pull it from a local source appears in this installation step:

Point to the license file locally and install it.
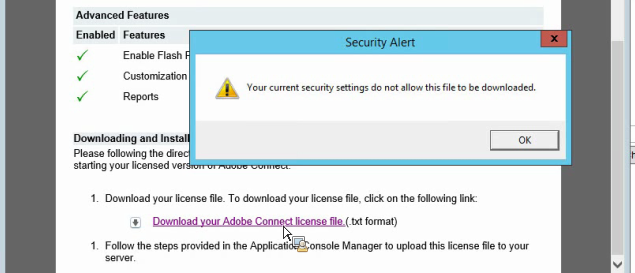
If you did not already download the license file and must now try to download it directly to the server, you may hit the link provided by the installer and try to download it. In nearly every case, security restrictions will require changes to facilitate a direct download of the license.txt to the Connect server. Workarounds include installing an additional browser on the server such as FireFox or Chrome to facilitate the download. In most cases, Internet Explorer can be made to cooperate; see below one of the common workarounds for restrictions on downloads:

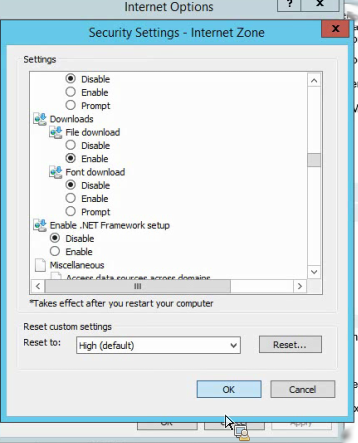
Go to Internet Explorer, Internet Options, Security Tab:
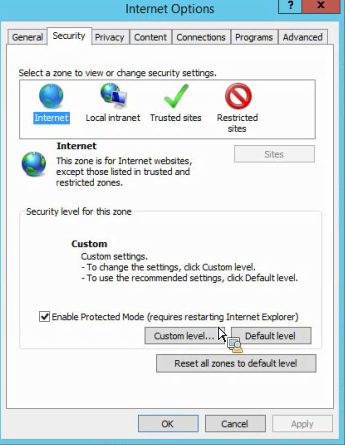
Enable Downloads>File Download:
Once the license is applied to the server, continue running the installation by choosing the relevant options; these options will be offered or restricted (greyed out) based on the features offered by the license applied:

Note: This example license feature list does not offer the CQ Author or Publisher Servers depicting that the Adobe Experience Manger, Events Module was not purchased or included in this license. This screen offers all of the various telephony adapters supported by Connect as well as the Flash Media Gateway (FMG) for Meeting integration with a SIP provider to facilitate Unified Voice (UV). Install any telephony adapters that are needed locally on the server. Do not install FMG locally: If FMG is needed, it is considered a best practice to install it on a separate server rather than to collocate it with Connect on the same server particularly if you are installing a Connect cluster and want to eliminate points of failure. FMG can also be clustered for redundancy and scalability. Do not install any telephony adapters that you do not need.
Continue running the installer by clicking Next:
Unless this is a lab installation without a distributed SQL server, do not choose to install the local desktop SQL option. Production Connect servers should always point to a separate distributed SQL server.

The next step is the connection to the separate SQL server and the creation of the Adobe Connect Database.
The Host field is the SQL cluster VIP or the resolvable name of the SQL server or its IP address; change it from localhost to the name of the SQL server. The user must have local SA permissions for the installer to create the Connect DB:
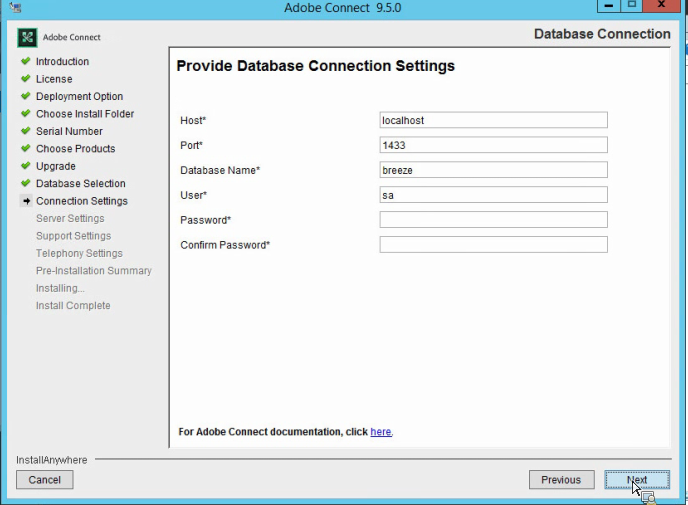
It is prudent to conduct the installation when the Database Administrator is available for help should the DB creation fail for any reason. Opportunities for error here at this step abound such as having the wrong DB server or VIP name, inadequate permissions, blocked routing between the Connect server and SQL server, etc. The following is an example of a typical error connecting to a SQL DB from the Connect installer. T
Note: here is not a progress bar or spinning icon to show progress or process while the installer is creating the Connect database. Wait patently at this step; the screen is not frozen, the work is happening behind the scenes. There is a feature request logged against the Connect installer to provide a progress bar or spinning icon at the step.
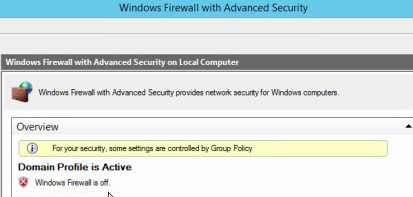
Here is an example of a typical error message that may appear at this step: In this particular case depicted above, the name of the SQL server provided was of one of the back-end SQL servers in a cluster rather than the SQL cluster VIP that pointed to both SQL servers. It is a name resolution problem. Among many other possible causes, there could be a software-based firewall on the Connect server blocking the DB port or an appliance blocking the connection server to server:
To check for a local firewall on Windows 2012, go to Server Manager>Tools>Windows Firewall with Advanced Security:

Note: Windows firewalls can also disrupt other needed Connect server to server communication in a cluster inhibit server failover. See the following article for more details on server to server port communication:
Make Certain that Content is Replicated Across All Servers in a Connect Cluster
For Success with Unified Voice for On-premise Connect Deployments be kind to SIP Traffic
Note: It is helpful to have telnet installed on the Connect server to allow testing connections to various ports particularly when installing a cluster or connecting to an Edge proxy server.
Connection to a remote SQL database can also be prevented by routing restrictions. The SQL databases servers are often installed at a different layer of the network than are the Connect application servers. In order for the Connect to reach the SQL servers it may need to traverse network obstacles. When scheduling an after hours installation it is prudent not only to have the DBA close at hand, but also to have the network team available as well.
One recent after hours Connect lab installation window was saved by a savvy Connect partner consultant: When he could not connect to the remote SQL server from the Connect server due to a firewall and he could not get networking assistance after hours, he decided to install Connect on the DB server itself. This is obviously not a best practice, but since in this case it was only a lab installation that would only have a few users on it, the decision sufficed and kept a major roll-out on schedule.
Once the source of any SQL driven error is diagnosed and solved, the installation will continue with the creation of the Connect DB by the installer; the next screen asks for an internal administrative account name and the Connect host name; the latter is important as this is the base URL for Connect clients, for example: connect.adobe.com.
This screen also offer the option to choose between a single server and a cluster, if you are installing a cluster, then choose the cluster option even if this is the first server in the cluster that you are installing. If this will be a standalone server then choose single.

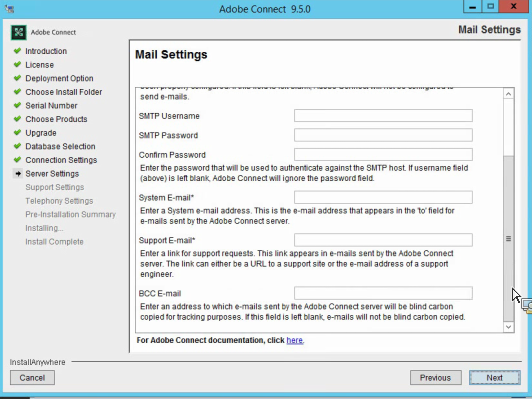
This next screen below requires SMTP data. If you do not have an SMTP account for Connect to use for system email, then put in temporary data that you may change later. The Connect installer will not test these entries for validity, but it will not allow you to leave them blank. Connect will need to leverage an SMTP server in order to function in production so if you do not have correct data and enter place-holder data to get through the installation, you will need to remedy this deficiency later by logging into the Connect Console (port 8510 locally on the Connect server) and editing the Mail Settings.

The next screen is Support Settings. Add the information for support contacts for Connect users; this is often a help-desk distribution list:

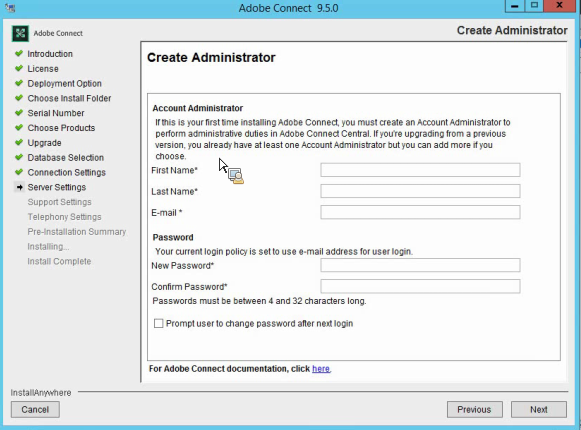
Next add the first Connect administrator:
A summary screen appears:

After clicking next you will see a progress bar as the installation continues:

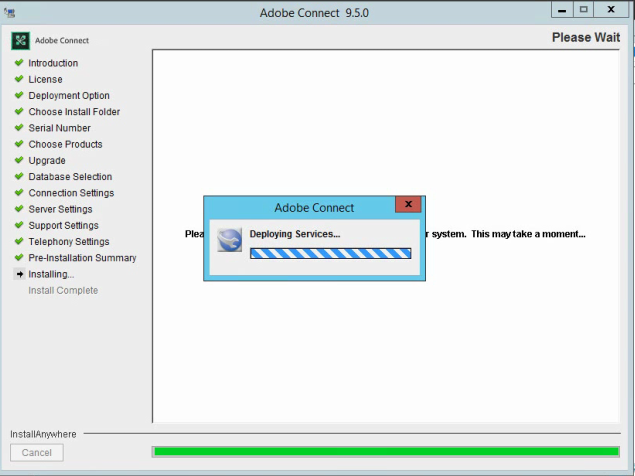
The next screen should show the deploying of services unless something went wrong during the installation process and there are errors. If you see this screen below then things are good and you may skip the next troubleshooting steps:
If instead of seeing Deploying Services, the Connect installer ends with an error messages; it is best to uninstall and reinstall. The error message may read: The installation of Adobe Connect finished, but some errors occurred during the Install. Please see the installation log for details. The good news is that it will be quicker because of some data entered previously from the initial installation attempt will auto-populate as you reinstall:
The most likely cause of this error is a lack of appropriate permissions for the installation; it happens commonly if the installer is not run with administrative privileges.
To help determine the cause, parse the two installation logs:
cp_install.log is located in the installation file source directory:
Adobe_Connect_Install.log is located in the root Connect installation directory:
![]()
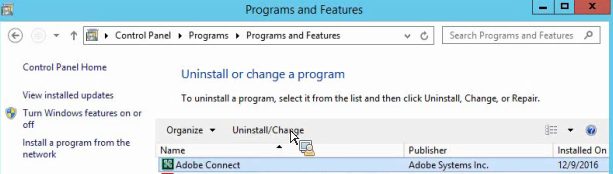
Uninstall Adobe Connect: Control Panel>Programs>Programs and Features
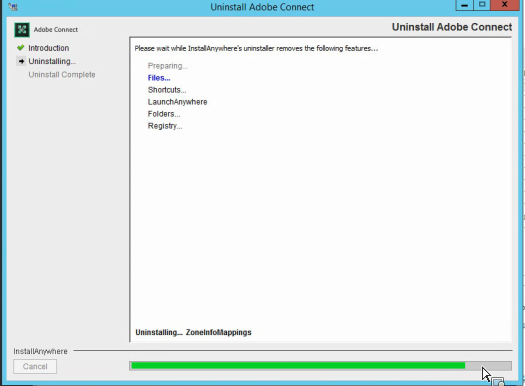
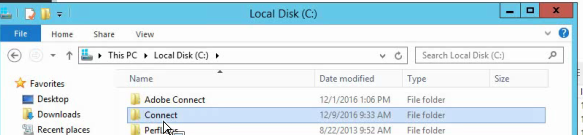
Note: Also delete the directory into which you attempted to install Connect. In this case it was C:Connect
Note: The SQL DBA will most likely see a partial Connect database installed on the SQL server. Delete the partial DB in preparation for re-installation.
To reinstall Connect, use the installer in the sub-folder: Disk1>InstData>VM and run the installer found there; it is a good idea at this point to reboot the computer before beginning the re-installation process; right-click and choose the Run as administrator option pictured below, as before, do not double click on this installer:
Follow the previously outline steps to reinstall; you will find that most of the data fields are pre-populuated expediting the re-installation process. When you get to the screen that reads Deploying Services, you will know that you succeeded.
If the error screen appears again instead of the Deploying Services screen then contact the Adobe Connect support team and provide them with the installation log file in the root installation directory for troubleshooting.
Note: The installation log is verbose; reviewing it may show the source of the error plainly. Open it an read it through.
After deploying the services, the option to initialize the Connect services will appear:

There is more than one option offered in this screen above. Choose to Start Adobe Connect and Open the Application Management Console. Click Done (with the caveat in mind that almost certainly you are not done – humor the installer).
Let this screen sit for a couple of minutes while Connect initializes. If the screen does not disappear then open a browser on the server and go to: http://localhost:8510/console
The Connect Management Console runs locally on port 8510. It can only be accessed locally from the Connect server browser. If this fails to launch then we will attempt to manually start the Adobe Connect and Adobe Media services:

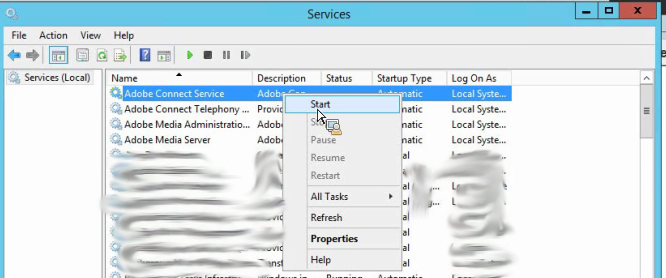
Go to Server Manager>Services (Local) and see if the Adobe Connect Service and Adobe Media Service are running.

If they are not started then start them in the following order: Adobe Media Service and then Adobe Connect Service.

Once both services are started, wait a minute and then attempt to launch the console again at port 8510 locally: http://localhost:8510/console
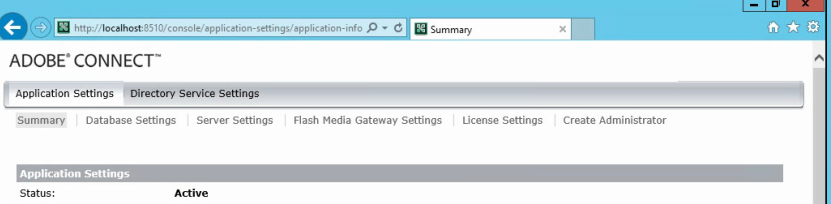
Upon seeing the console launch, you have successfully installed a single Connect server with the base installer. This is a good point to reboot the Connect server prior to moving on to the next steps of either adding servers to the cluster (if this is not a single server installation) or of installing the update files and patches.
If you are installing a cluster, the next step is to run the full installer on the second and then subsequent servers in the cluster and point them to the same DB. You will have to add all the cluster account data to each server during the installation. There is a feature request currently to auto-populate the account data into additional servers during a cluster installation.
Note: In order to run a cluster, you must have purchased a Connect cluster license. If you have a single server license and wish to expand to a cluster, contact your Adobe Sales Representative and request to purchase additional servers to be added to your license.
If you have installed 9.6.1 as the base installer you will need to incrementally install the relevant updater files; currently they range from 9.6.2 through 9.7b.
Each updater file has its own readme file with specific instruction. Some of the update packages include multiple executable files and some include SQL update scripts that must be run against the Connect database directly with local SQL permissions. When installing these it is important to make sure the Adobe Connect Service and the Adobe Media Service are both shut off (in that order).
Let’s look at the first few patches beginning with 9.6.2. Ignore the MACOSX directory and drill into the Patch_ACS directory:
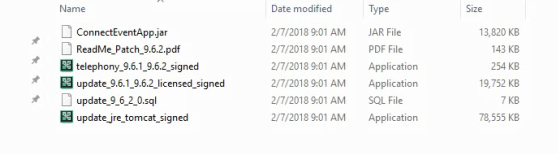
In the case of this updater, there is a telephony update, a Connect update, a SQL DB update and a tomcat update. The ConnectEventApp patch is not relevant because this server is not running the AEM-based Events module. If you were running Events, then you would install the AEM patches provided in each updater. The SQL updater is a script that must be run directly on the Connect Database.
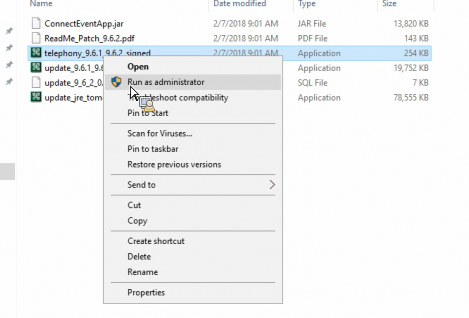
Run the telephony updater first making sure it is installing to the correct root Connect installtion directory:
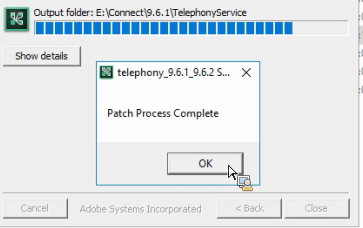
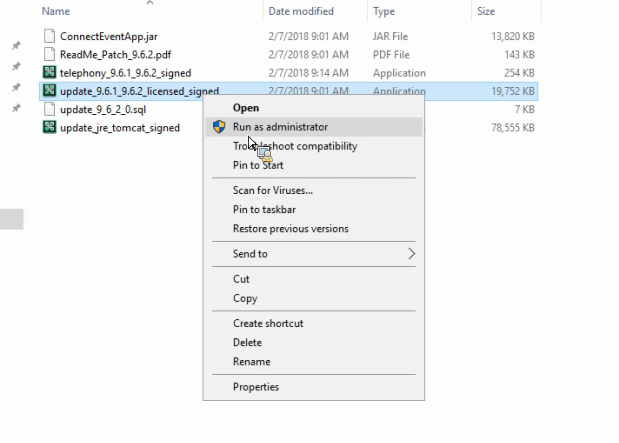
Next install the Connect updater:

Next install the tomcat update:

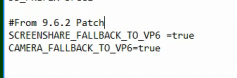
There was one additional step prescribed in the readme PDF file for this updater. The change is to add the following lines to the custom.ini file in the root Connect installation directory. It is important to read the instructions provided with each updater package as additional steps, if missed, could cause problems:
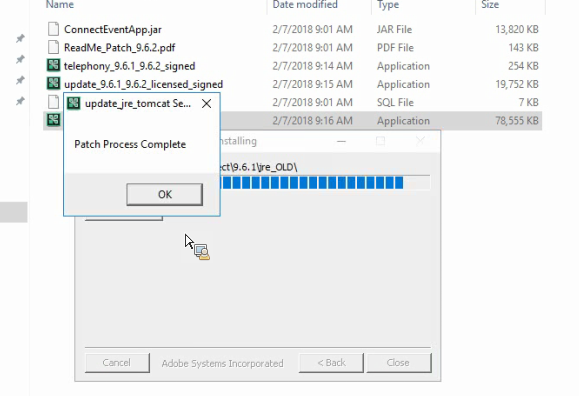
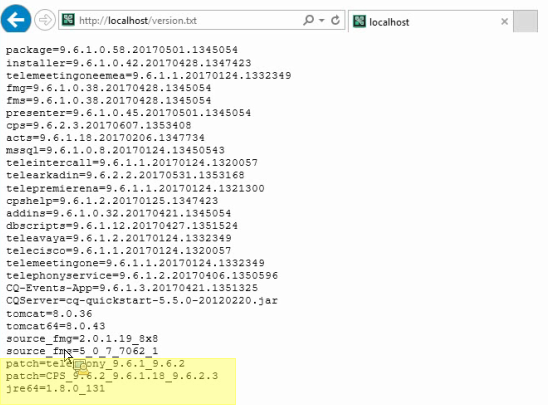
After installing each patch, start the start services in the following order: Adobe Media Service and then Adobe Connect Service. After starting the services check the version.txt file to be sure the installation succeeded. On the Connect server: http://localhost/version.txt See in the capture below that 9.6.2 was successfully applied:
Note: In the case of a Connect cluster, apply these patches to each server one at a time alternating between or among servers and stopping and starting the services and testing each server.
Between patches, shut down the Connect and AMS services and run the relevant update executable files on the Connect server or servers. You must run any SQL updater scripts on the SQL server itself with local SA permissions.
By carefully following the prescribed update steps along with any addition steps that may be documented by the readme files supplied with each updater, you will successfully bring the Connect server up to the latest version. We looked at the first updater package that 9.6 requires. Other updaters could include tomcat updates, msxml updates, jre updates, etc. Always read the readme file PDF provided with each updater prior to installing.
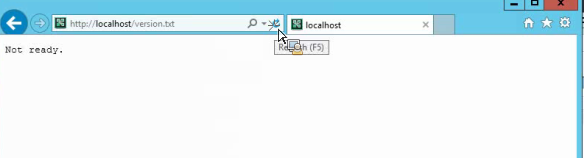
When you check the version.txt between each updater, if the new version does not appear immediately at the bottom of the text file then refresh the browser a couple times. It may also be slow in appearing and display a note that reads: Not ready. If this persists, then disable the Adobe Connect Service and the Adobe Media Service and reboot the computer. Install the patch or updater and then start the Adobe Media Service and then Adobe Connect Service. After starting the services check the version.txt file again to be sure the installation succeeded. On the Connect server locally: http://localhost/version.txt.
In this article we have reviewed the context of a basic Connect server installation and update procedures with an eye toward some common errors that may occur and how to ameliorate them.