Connect On-premise Server Upgrade Fails because of Encrypted SQL Connection
On-premise Connect server upgrades will fail when SQL is using a secure encrypted connection between Connect and the SQL database.
Most on-premise Connect deployments do not use encrypted SQL conenctions, instead access is restricted to the DB layer/SQL via partitioning and firewalls. This tech-note only applies to encrypted SQL connections; this upgrade tech-note applies to you if you have installed Connect and then set up SQL encryption according to this tech-note:
Configuring Secure SQL with Connect
In order to upgrade Connect running with an encrypted SQL connection, you will need to remove SQL encryption until the upgrade is complete and then you may reapply SQL connection encryption. Minor Connect dot updates and patches may not appear to fail, but they will be unable to update the Connect database as long as encryption is in place. For example if you apply the 9.2.1 update to a 9.2.0 server, the following will result:
The version.txt file will read mssql=9.2.1.0, while the Database_Version table from the SQL DB will read 9.2.0.0.
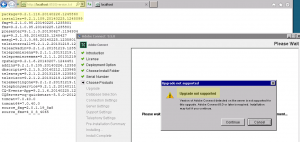
Full installer upgrades will fail with more server log errors, among them you will see this:
java.sql.SQLNonTransientConnectionException: [Macromedia][SQLServer JDBC Driver]The SQL Server login requires an SSL connection.
And an option on this theme in the installation GUI will manifest where, in this case pictured, the 9.5 installer fails in an attempt to upgrade a 9.2 Connect server:
The following steps are required to remove SQL encryption to facilitate upgrading:
- Open SQL Server Configuration Manager
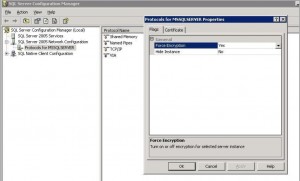
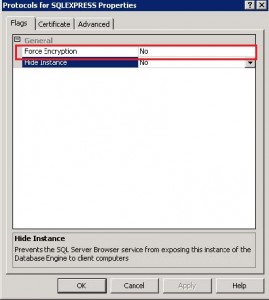
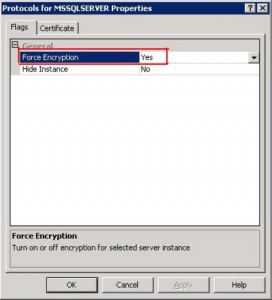
2. Open the Protocols for MSSQL Server Properties
3. Under the Flags tab, change Force Encryption to No
4. Under the Certificates tab, clear the certificates and click OK.
5. Restart SQL.
6. On the Connect application server, edit the ConnectProSvc.conf file in the appserv directory; remove the following entries in the list of JAVA arguments (If they exist):
wrapper.java.additional.28=-Djavax.net.ssl.trustStore= <path of Trust Store file created >
wrapper.java.additional.29=-Djavax.net.ssl.trustStorePassword=<Truststore Password >
7. In the custom.ini file in the connect (or breeze) installation root directory, comment the following entries:
DB_ENCRYPTION_METHOD=SSL
DB_VALIDATE_SERVER_CERTIFICATE=true
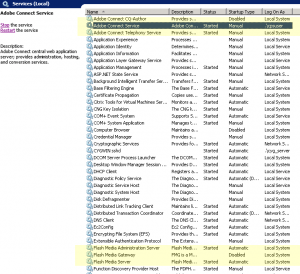
8. Restart the Adobe Connect and AMS/FMS Services
At this point you are ready to run the Connect updates or upgrade. After you have successfully run the upgrade and performed a full function check, you may reapply the encryption to the Connect SQL database connection by reversing the steps above. Abbreviated they are:
- Open SQL Server Configuration Manager
- Open the Protocols for MSSQL server Properties
- Under the Flags tab, change Force Encryption to Yes
4. Under the Certificates tab select certificate created previously and click OK.
5. Restart SQL services
6. In the ConnectProSvc.conf file in the appserv directory, add the following entries in the list of JAVA args:
wrapper.java.additional.28=-Djavax.net.ssl.trustStore= <path of Trust Store file created >
wrapper.java.additional.29=-Djavax.net.ssl.trustStorePassword=<Truststore Password >
7. In the custom.ini file in the connect (or breeze) installation root directory, uncomment or add the following entries:
DB_ENCRYPTION_METHOD=SSL
DB_VALIDATE_SERVER_CERTIFICATE=true
8. Restart the Adobe Connect and AMS/FMS Services.
Note: For greater detail refer to the original tech-note on encrypting the SQL connection: Configuring Secure SQL with Connect
