Working with Chat Transcripts
UPDATED – March 14, 2017.
As part of the Compliance and Control settings in Adobe Connect, administrators have the ability to enable Chat Transcripts for logging all chat happening on the Adobe Connect server. This setting is located at: Administration > Compliance and Control > Recordings and Notice > Enable Chat Transcripts. This is for both On Premise and Hosted Customers although the first section describing the manual retrieval of files is for On Premise only. The rest is applicable to any Connect deployment.

This transcript is stored on the Adobe Connect server in XML format. One file for each meeting session. Each file contains the chat from all chat pods used during that session. When a meeting session has begun, the chat transcript is not created until someone first starts typing in the chat pod. At the moment the first chat begins, a new sco (unrelated to the meeting sco itself) is created in the file system ({root}\Connect\content\7\XXXXX-1 where XXXXX = the unique sco-id that gets assigned by Connect for this item). The folder inside of the sco folder will be named ‘input‘ for the duration of the meeting session and will then change to ‘output‘ once the session is ended and fully unloads from memory. Once the session is over, the chat transcript is available for retrieval. This can be a good option for ON PREMISE customers only. Adobe Connect Hosted customers won’t have access to the file system in this manner and will have to retrieve the transcripts via a method described further below in this article.
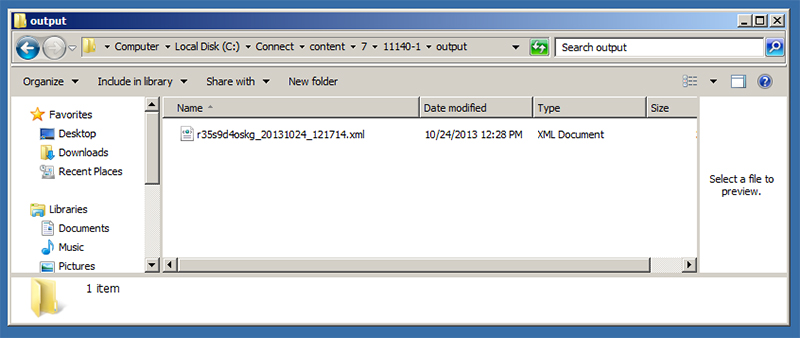
On Premise view of file system based retrieval of Chat Transcript.
Only administrators have the ability to navigate to and obtain these chat transcripts. Here is the workflow you can use to download chat transcripts from the server, if the chat transcripts are enabled:
Option 1: API Workflow (for both ON PREMISE and HOSTED Connect deployments):
1) Find the folder for Chat Transcripts on the Connect system. This is actually a hidden folder and you cannot navigate to it by the normal UI. To do this, run the following API call:
http://{myServer}/api/xml?action=sco-contents&sco-id=7&filter-like-name=Chat
where sco-contents = the api call.
where sco-id = the account-id of the system (for On Prem Connect licenses this will be ‘7’, for hosted customers it will be unique to your system)
where filter-like-name=Chat
It will return the location of the Chat Transcripts folder.
Results will look like this:
<results>
<status code=”ok”/>
<scos>
<sco sco-id=”11011″ source-sco-id=”” folder-id=”7″ type=”tree” icon=”folder” display-seq=”0″ duration=”” is-folder=”0″>
<name>Chat Transcripts</name>
<url-path>/f88952271-4-14/</url-path>
<date-created>2013-10-24T07:30:08.460-07:00</date-created>
<date-modified>2013-10-24T07:30:08.460-07:00</date-modified>
<is-seminar>false</is-seminar>
</sco>
</scos>
</results>
2) Take the sco-id from this result set (in the above example it’s 11011) and run the following call:
http://{myServer}/api/xml?action=sco-contents&sco-id=11011
where the call is again ‘sco-contents’
where sco-id = the sco-id from the result of the first call.
This will list out all the Chat Transcripts on the system and the result will look like this:
<results>
<status code=”ok”/>
<scos>
<sco sco-id=”11140″ source-sco-id=”11137″ folder-id=”11011″ type=”content” icon=”transcript” display-seq=”0″ duration=”645″ is-folder=”0″><name>r35s9d4oskg_0</name>
<url-path>/p16jb8mcs6v/</url-path>
<date-begin>2013-10-24T12:17:15.127-07:00</date-begin>
<date-end>2013-10-24T12:28:00.263-07:00</date-end>
<date-created>2013-10-24T12:17:15.127-07:00</date-created>
<date-modified>2013-10-24T12:28:00.263-07:00</date-modified>
<is-seminar>false</is-seminar>
</sco>
</scos>
</results>
(in this example, I ONLY have 1 transcript on the system, so it only shows 1 above).
If you have a lot of transcripts (which you will after you enable this setting), you may want to filter on the meeting for which the transcripts were from. This can be done by filtering on the ‘source-sco-id’ which is the sco-id of the meeting that was held. So if you know the sco-id of the meeting, and you know the date range for which you had the session, you can filter on either the source-sco-id value (which will = the sco-id of the meeting) and/or the date/time fields to limit the data returned and find the transcripts you are looking for.
Now, the URL-path you see above in the second XML result is NOT accessible directly. You cannot just append the value above (like ‘/p16jb8mcs6v/‘) to the Connect domain and expect to get the transcript. This is what you need to do to download the file directly:
3) Take your Connect domain + the url-path value + ‘output/foo.zip?download=zip‘ so the URL example would be:
http://mycomany.connect.com/p16jb8mcs6v/output/foo.zip?download=zip
This will get you a downloaded zip file that contains the Chat Transcript (in XML format).
Option 2: SEARCH in the UI (for both ON PREMISE and HOSTED Connect deployments):
What an Administrator can do is search in the Search area and find the Chat Transcript folder in the Connect Central UI (it is hidden and you will have to find it and bookmark it for easy access) or the individual transcript itself.
Just simply go up in the top right-hand corner of the Connect Central UI and click the ‘Search’ button/link under your logged in identity.
Then type in the URL of a meeting you know you had a transcript for (if Chat Transcripts were turned on as described at the top of this article, and a meeting has been held after it was turned on, and chat was used, you will have transcripts for that meeting). The chat transcript will have the same name as the meeting URL and then an ‘underscore’ + a numeric value. That indicates the number of the session for that meeting.
So in my example below, I had a meeting with the URL ‘/florida/’. I searched for ‘Florida’ and it returns 3 items in my account that I have access to that is called “Florida”. One is a Meeting, one is a Recording, and the last is a Chat Transcript (from session 14 of that meeting).
![]()
There are now two different things you an do from here…
- You can click on the link to the individual transcript under the ‘Name’ column for the transcript itself. It will take you to a page that will give you a ‘REQUEST NOT PROCESSED‘ error. However that is OK. Your URL will look something like this:
http://mycomany.connect.com/p16jb8mcs6v
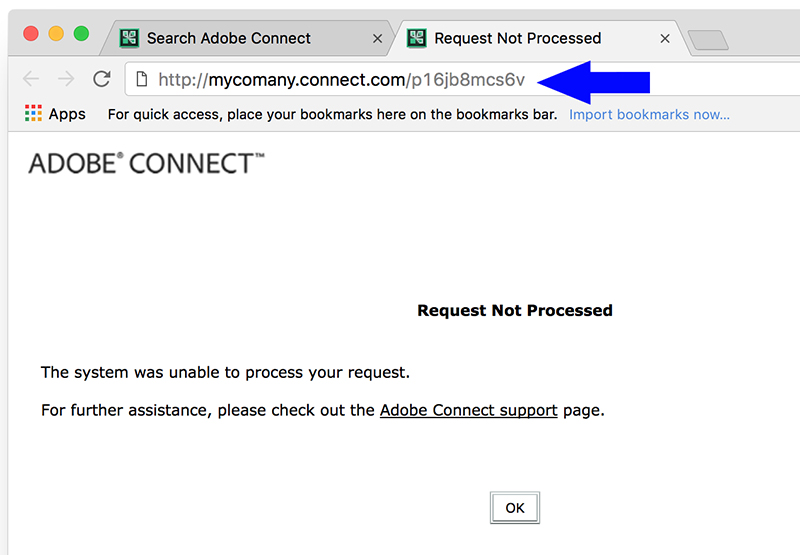
But again, the page will be a white error screen with ‘Request Not Processed’. Simply add ‘output/foo.zip?download=zip’ to the end of the URL in the browser and hit enter again and you will see the download start. It’s the same process as step 3 in the above Option 1 workflow.
So the full URL would look like this: http://mycomany.connect.com/p16jb8mcs6v/output/foo.zip?download=zip
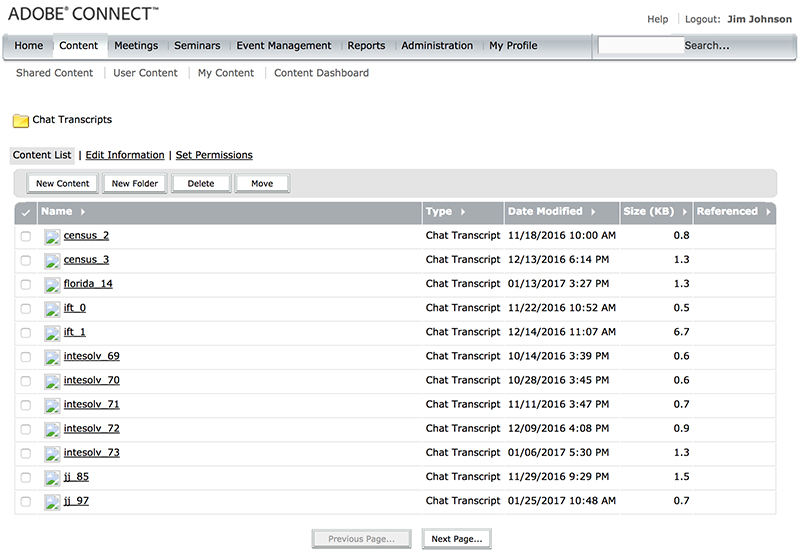
2. You can also click the Parent Folder link in the Search results called ‘Chat Transcripts‘.
This will take you to a full Chat Transcripts hidden view in the Adobe Connect Central UI where you will see all of your Chat Transcripts that have been archived since you turned the feature on. Example view below.
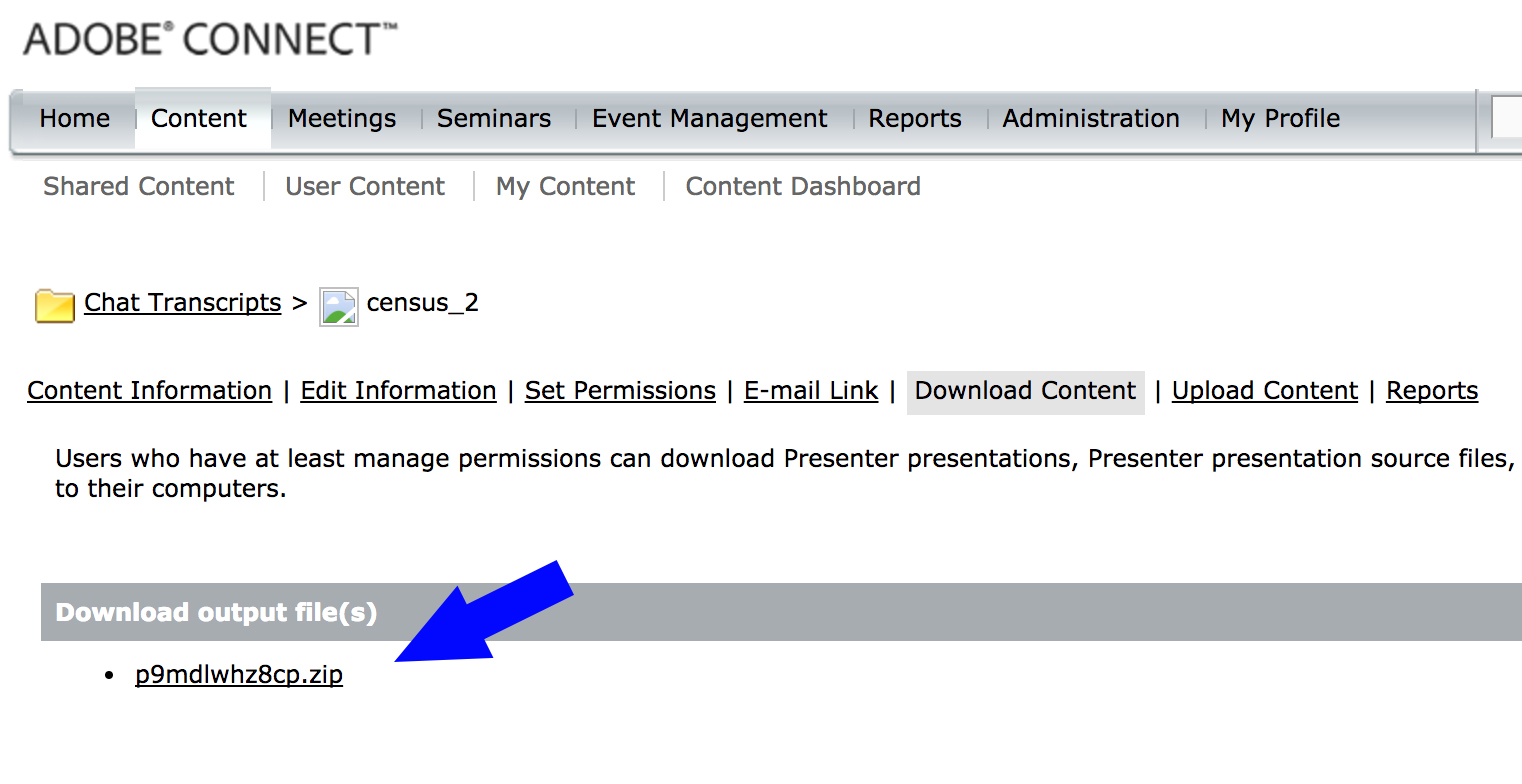
From this view, you click on the name of the Chat Transcript itself.
It will take you to a screen like this:

Click on the ‘Download Content’ link to download a zip of the XML Chat Transcript for that Meeting session.
I’ve done everything until I got on step 3. I’ve tried “foo.zip”, “{url-path}.zip” (as document on development guide) and so on… always “document not found”.
Rui, I just sent you an email.