Launching a webinar program from scratch is a large project – one that typically starts with choosing a webinar platform. However, once you’ve selected that perfect webinar technology platform and have logged in for the first time, now what?
Setting up your webinar account and delivery room is a key component of the program that requires careful planning and execution for ultimate success. Here are a few set up considerations and suggestions for getting your program off to a great start:
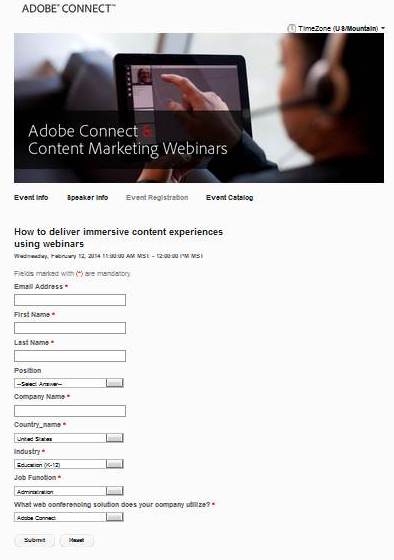 Registration: Setting up your registration microsite is most likely one of the first tasks you will want to complete, and the first interaction point with your target audience. Consider the number and type of questions you will require – if the webinar is at the top of your marketing funnel, perhaps you ask less questions than you might if the webinar is further down the funnel. You will want to spend some time designing and branding the entire experience from the landing page to the confirmation and reminder emails, ensuring that the look and feel of the registration experience is aligned with your corporate image and the specific webinar imagery. When crafting your confirmation and reminder emails, be as concise and clear as possible about how to attend your event on the day of – if you can, include an Outlook calendar meeting. For your reminder emails, it is a best practice to schedule two to be sent the day before and the hour before. Before you create and publish your registration site, consider whether you will want to use a password/profile model that would allow registrants to register for future events simply by using their login rather than filling out all the registration fields again. If your webinar program is geared to repeat users, using a password to store their profile is a great option.
Audio options: There are three ways to provide audio during a webinar: 1) VoIP only (through the computer speakers), 2) teleconferencing only (phone only) or 3) simulcast (deliver audio via both VoIP and teleconferencing. Your choice will depend on your audience’s preference, your webinar platform and your budget. Some webinar platforms include VoIP or teleconferencing for free, others charge a fee for one or both, and some integrate with audio providers. Ensure and test that you have set up your audio broadcast choice correctly and fully understand how to implement and deploy it during the live event. For more info see this post.
Room access settings: Depending on the type of your webinar, you will want to set the room access a particular way. For public marketing webinars, the typical set up allows the broadest access – so allowing anyone with the URL to enter is the room is the norm. You can also choose options that include requiring a password or limiting attendees to registrants only.
Key stakeholder access: As you work to set up your webinar account you will want to ensure that you add your moderators, hosts and presenters to your account as users. After they have been made users on your account with the appropriate rights as you deem fit, you will want to ensure that they receive the webinar room information and are able access the room ahead of the event without issue.
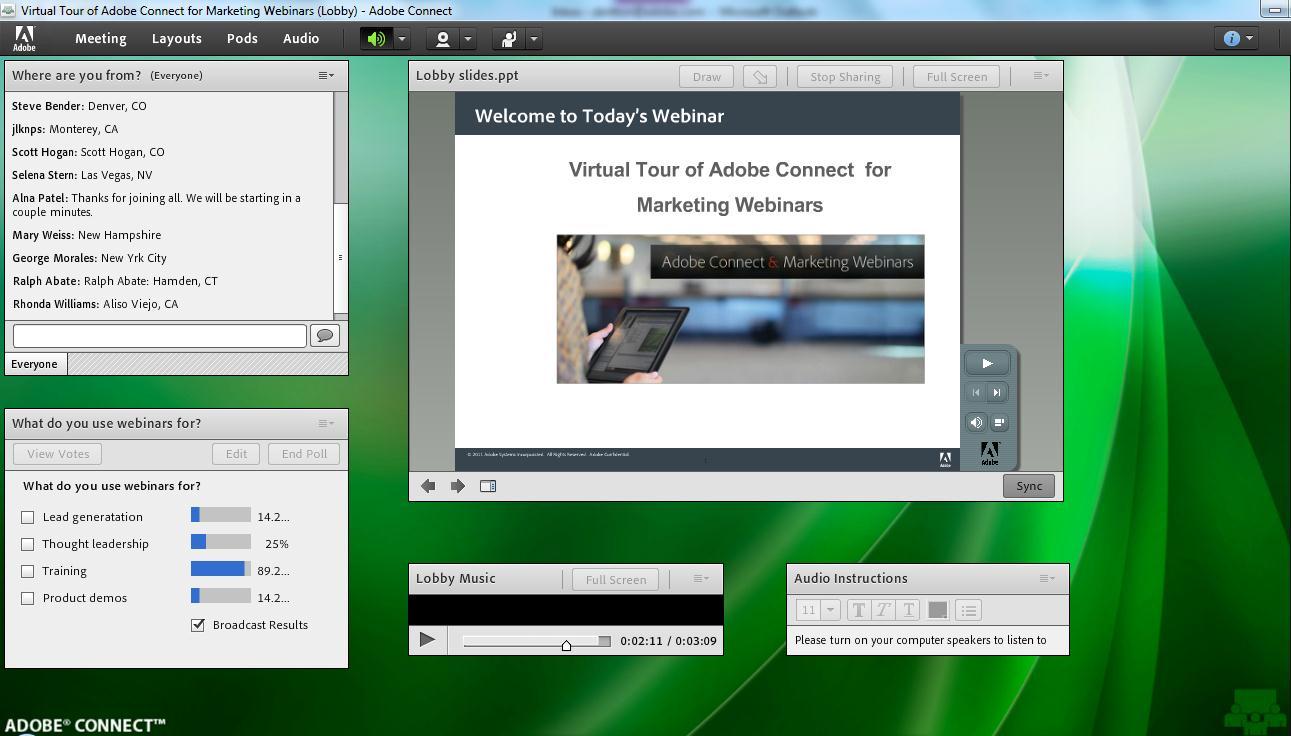 Webinar room design: There are many best practices for good webinar room design and many ways to design your room (if your webinar platform allows for custom design). Let’s assume that your webinar platform includes custom design options. Starting with the Presenter Only Area, some common elements to include here are a Presenter Chat pod for private communication, a Note pod for FAQs and resources, the Attendee Pod to keep attendance private (if desired) and the Q&A pod in order to moderate and answer questions. In the Attendee area you will typically want a Note pod with instructions on how to join the audio, the main slide presentation, the Q&A pod for submitting questions and perhaps a headshot of your speaker. From this basic design, you can get creative by adding music, video, polls, open chat or other elements as you see fit. For ideas on creating a Lobby for early birds as they wait for the event to begin, see my previous post.
![]() Presentation flow: Determining the flow of the event as well as who does what and when, will be key to a smooth event and will impact room design. You can use the layout feature (available in Adobe Connect) to organize your agenda and flow through activities easily. For instance, if you are plan to give an introduction, then present the main presentation for 15 minutes, conduct a poll, finish your presentation and then move into a Q&A session, you can create a layout for each of these segments of your webinar so that you can quickly and easily click through each layout as you move through your agenda. Keep this in mind when you design your room and develop as many layouts as you have transitions. Creating a layout for each segment has the advantage of saving time and smoothing out transitions from one activity to the next. So if you have a poll planned, you would simply click on the layout you developed for the poll and it would be ready to use.
Presentation flow: Determining the flow of the event as well as who does what and when, will be key to a smooth event and will impact room design. You can use the layout feature (available in Adobe Connect) to organize your agenda and flow through activities easily. For instance, if you are plan to give an introduction, then present the main presentation for 15 minutes, conduct a poll, finish your presentation and then move into a Q&A session, you can create a layout for each of these segments of your webinar so that you can quickly and easily click through each layout as you move through your agenda. Keep this in mind when you design your room and develop as many layouts as you have transitions. Creating a layout for each segment has the advantage of saving time and smoothing out transitions from one activity to the next. So if you have a poll planned, you would simply click on the layout you developed for the poll and it would be ready to use.